
TL;DR
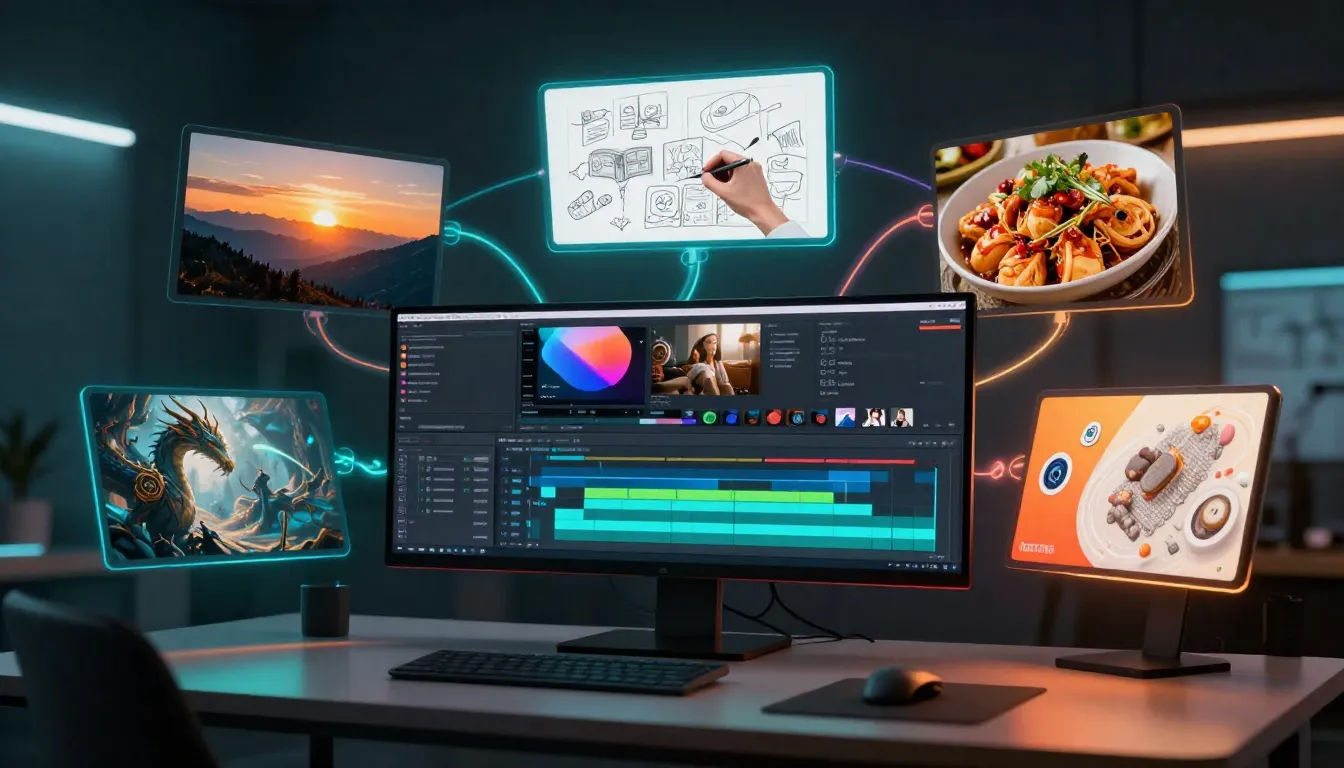
Video creators need images at every stage of production: first frames for AI video generation, storyboards for pre-production planning, thumbnails for YouTube and social platforms, promotional covers, concept art for pitching ideas, and reference images for guiding live shoots. AI image generators can produce all of these in minutes, replacing what used to take hours of manual design work or hundreds of dollars in freelancer fees.
The workflow shift is significant. Instead of hiring a designer, opening Photoshop, or digging through stock photo libraries, you describe what you need in a prompt and generate it in seconds. But for video creators specifically, there is an even bigger advantage: the images you generate can directly feed into an AI video generator as first frames, creating a seamless pipeline from concept to finished video.
Seedance combines this entire workflow into a single platform -- generate a prompt with the Image Prompt Generator, create the image with the AI Image Generator, and then animate it with Image-to-Video. No tool-switching, no file exports, no format compatibility headaches.
Generate video-ready images --> | Create perfect prompts --> | Turn images into videos -->
AI image generators give video creators a complete visual toolkit -- from storyboard frames and concept art to video-ready first frames that feed directly into AI video generation.
Why Video Creators Need AI Image Generators
If you create video content -- whether for YouTube, TikTok, client projects, short films, or advertising -- you already know that video production is not just about video. It is about all the images that surround, support, and enable the video process.
Before a single frame of video exists, you need images. After the video is done, you need more images. The image needs of a video creator span the entire production lifecycle, and most creators underestimate how much time they spend on static visuals.
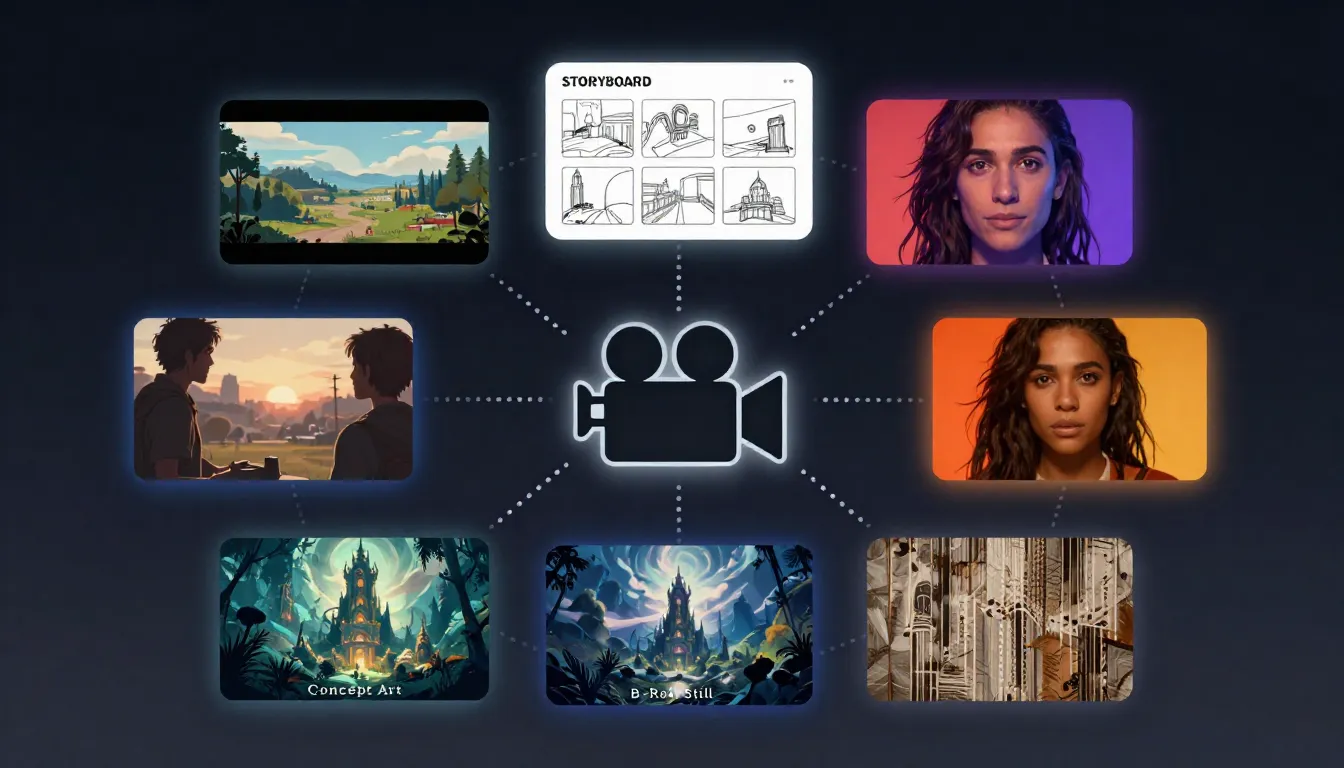
The Six Image Needs of Every Video Creator
1. First and reference frames for AI video generation. This is the most impactful use case for video creators in 2026. When you generate a video from an image rather than from text alone, you get dramatically more control over the output -- the subject, composition, lighting, mood, and color palette are all locked in by your reference image. A well-designed first frame is the difference between a usable AI video clip and one that misses the mark entirely. For a deep dive into this technique, see our complete First & Last Frame Guide.
2. Storyboards for pre-production planning. Whether you are planning a commercial, a music video, or a YouTube series, storyboards help you visualize shots before committing to production. Traditional storyboarding requires drawing skills or the budget to hire a storyboard artist. AI generation eliminates both barriers.
3. Thumbnails for YouTube, TikTok, and social platforms. Thumbnails are the single most important factor in click-through rate on YouTube. A compelling thumbnail can double or triple your views compared to a mediocre one. Video creators who can rapidly generate, test, and iterate on thumbnail designs have a measurable competitive advantage.
4. Social media covers and promotional graphics. Every platform has its own dimensions and visual expectations. You need YouTube channel banners, Instagram post images, Twitter/X headers, TikTok cover images, and more -- each formatted differently and ideally reflecting your brand's visual identity.
5. Concept art for pitching ideas to clients and teams. When you are proposing a video concept to a client, a brand, or your own team, abstract descriptions fall flat. A generated concept image communicates mood, style, and visual direction in a way that words cannot. This accelerates approval cycles and reduces the "that is not what I imagined" feedback loop.
6. B-roll reference images for guiding live shoots. If you work with cinematographers, directors, or production crews, reference images convey exactly the shot composition, lighting setup, and mood you want. They function as visual briefs that reduce on-set miscommunication and speed up the shooting process.
The Traditional Workflow vs. The AI Workflow
The traditional approach required video creators to either develop graphic design skills (learning Photoshop, Illustrator, or Canva), hire freelance designers ($50-200 per project), license stock photography ($10-50 per image), or simply settle for whatever free resources they could find. Each approach introduced delays, costs, or quality compromises.
For a single YouTube video, the traditional image workflow might look like this: 2-3 hours designing a thumbnail in Photoshop, 30-60 minutes sourcing stock photos for a storyboard, $75 for a freelance graphic designer to create channel art, and repeated back-and-forth iterations on each deliverable. Multiply that across a publishing schedule of three videos per week and you are looking at a significant time and financial investment in static images alone.
The AI workflow compresses all of this into minutes. Describe what you need in a prompt, generate it, review the output, iterate if necessary, and move on. A thumbnail that took two hours in Photoshop takes two minutes with an AI image generator. A storyboard that required hiring an artist takes ten minutes of prompt writing. Concept art that needed a specialized illustrator is generated on demand.
The cost difference is equally dramatic. Instead of per-image licensing or per-project freelancer fees, you pay a fraction of a credit per generation and can produce dozens of variations to find the perfect option.
Video production is surrounded by image needs at every stage. AI image generators address all six categories -- from pre-production concept art to post-production thumbnails and promotional graphics.
6 Ways Video Creators Use AI Image Generators
These are not hypothetical applications. Each method below represents a real workflow that video creators are using in production today. We have ordered them by impact -- starting with the use case that delivers the most value for video creators specifically.
1. First Frames for AI Video Generation
This is the single most impactful way video creators use AI image generators in 2026. The concept is straightforward: generate a high-quality image that represents the perfect opening frame of your video, then feed that image into an AI video generator to animate it.
Why does this matter? Because text-to-video generation is inherently unpredictable. When you describe a scene in words alone, the AI decides what the subject looks like, how the scene is composed, what the lighting looks like, and what color palette to use. You might get something great, or you might get something completely different from what you envisioned.
Image-to-video flips this equation. By providing a first frame, you define every visual element with certainty. The AI's only job is to generate motion -- and that is a much simpler, more reliable task. The result is video that looks exactly the way you intended.
Design principles for video-ready first frames:
-
Leave motion space. Do not fill the entire frame edge-to-edge with your subject. If you want the camera to pan right, leave visual room on the right side. If you want your subject to walk forward, leave space in the direction of intended movement. A cramped composition gives the AI nowhere to go.
-
Use clear, well-lit subjects. The AI needs to understand what is in the frame in order to animate it convincingly. Subjects with clean edges, clear separation from the background, and adequate lighting produce the best motion results. Avoid heavily silhouetted or backlit subjects unless that is the specific aesthetic you want.
-
Consider the intended camera movement. If you plan to use a slow zoom, make sure your subject has enough detail to hold up at closer magnification. If you want a wide pan, ensure the background has visual interest beyond the subject. Design the frame with the motion in mind.
-
Match the aspect ratio to your video format. Generate 16:9 images for horizontal video (YouTube, desktop), 9:16 for vertical video (TikTok, Reels, Shorts), or 1:1 for square formats. Starting with the correct aspect ratio avoids cropping issues when the image becomes a video frame.
-
Maintain physical plausibility. Avoid impossible compositions or elements that defy physics. The AI will try to animate everything according to physical rules, so a person floating in mid-air or an object defying gravity will produce confusing motion.
The Seedance pipeline makes this workflow seamless:
- Start with the Image Prompt Generator to create a detailed, optimized prompt for your first frame.
- Generate the image using the AI Image Generator or Text-to-Image tool.
- Review the output and iterate if necessary -- adjust the prompt, regenerate, or use Image-to-Image to refine.
- Upload the finalized first frame to Image-to-Video and generate your video clip.
This entire pipeline happens within one platform, which means your generated images are already in the right format and quality for video generation. No downloading, re-uploading, format conversion, or compatibility issues.
For a comprehensive deep dive into first frame techniques including composition strategies, subject design, and advanced paired-frame workflows, see our First & Last Frame Guide.
Well-designed first frames leave motion space, use clear subjects with good lighting, and consider the intended camera movement. These generated images become the visual anchor for the resulting AI video.
2. AI Storyboards
Storyboarding is one of the most valuable pre-production processes in video creation -- and one of the most frequently skipped because it traditionally requires either drawing ability or a budget to hire a storyboard artist. Most solo YouTube creators, social media producers, and small production teams skip storyboarding entirely, leading to less organized shoots, more wasted footage, and videos that meander instead of communicating a clear visual narrative.
AI image generation eliminates the skill and cost barriers completely. You describe each shot in plain language and generate a visual reference for it. The result is a storyboard that communicates shot composition, framing, lighting mood, and visual pacing -- all created in a fraction of the time and cost of traditional methods.
The AI storyboarding workflow:
Step 1: Write your script or shot list. Break your video concept into individual shots or scenes. For each one, note the camera angle, subject positioning, lighting mood, and any key action. You do not need a full screenplay -- even a bullet-point list works.
Step 2: Create prompts for each shot. For each shot in your list, write a descriptive prompt that captures the visual you need. Be specific about composition (close-up, medium shot, wide shot), lighting (golden hour, dramatic side-lighting, soft diffused), and subject positioning.
Step 3: Generate images with a consistent style. This is critical for storyboard coherence. Use the same style modifier across all your prompts to ensure the storyboard reads as a unified visual plan rather than a collection of random images. Styles like "concept art," "digital illustration," "cinematic frame," or "storyboard sketch" work well.
Step 4: Arrange into a storyboard grid. Organize your generated images into a sequential grid that represents the flow of your video. Add shot descriptions, camera notes, and timing annotations beside each frame.
Pro tip: Use the Image Prompt Generator for every scene prompt. This ensures consistent prompt quality across your entire storyboard. When you feed each scene description through the same prompt optimization tool, you get prompts of uniform quality and structure, which produces more visually coherent storyboard frames.
Style recommendation: For storyboard aesthetics, include style modifiers like "concept art style," "pre-production illustration," or "cinematic storyboard frame" in your prompts. These produce images that look intentionally like pre-production art rather than finished photography, which helps collaborators understand that the storyboard is a planning document, not a final deliverable.
AI storyboards are particularly powerful when combined with the first-frame workflow above. Once your storyboard is approved, each storyboard frame can serve as the starting point for actual AI video generation -- turning your planning document into a production asset.
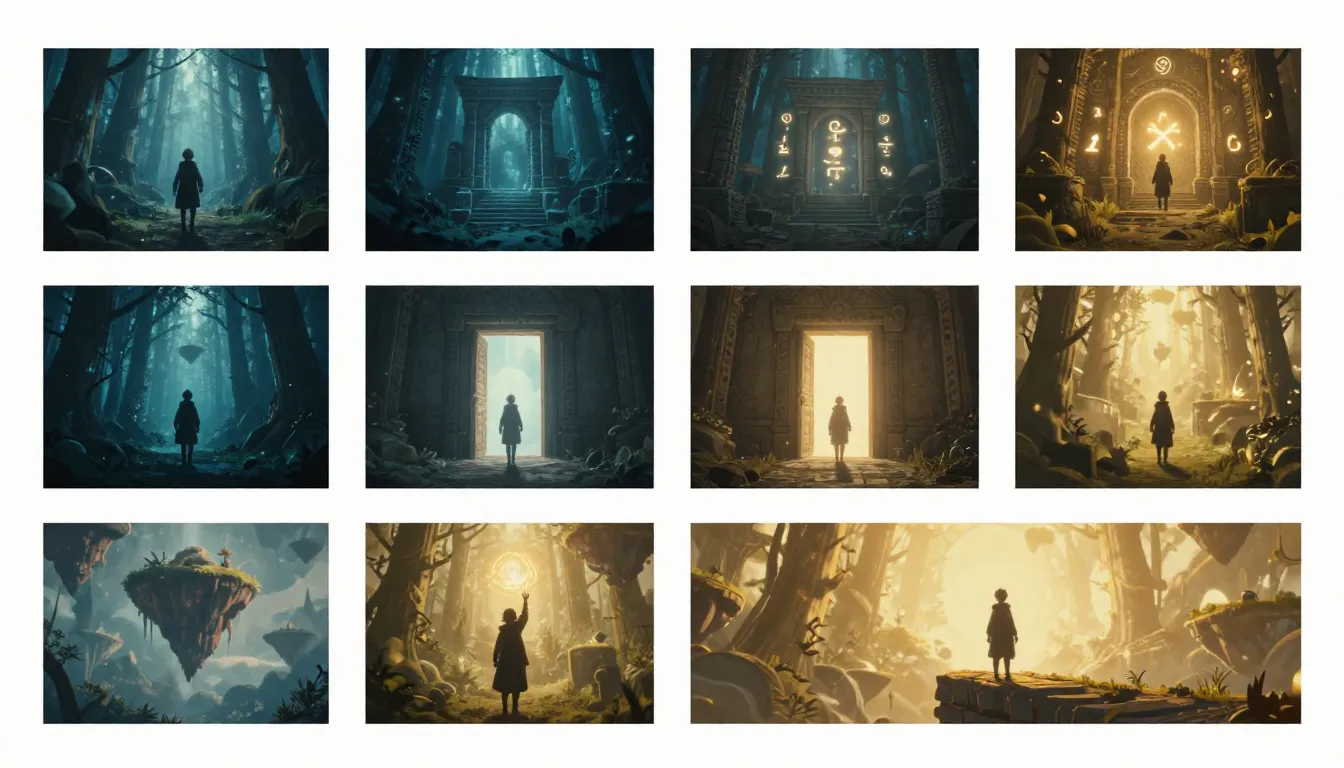
AI-generated storyboards communicate visual intent clearly without requiring drawing skills. Each frame is generated from a text prompt, and using consistent style modifiers ensures the storyboard reads as a unified visual plan.
3. YouTube Thumbnails
YouTube's own internal data consistently shows that thumbnails are the single most important factor in click-through rate. A video with a great title but a mediocre thumbnail will be outperformed by a video with a good title and a compelling thumbnail every time. This is not speculation -- it is how the algorithm works. YouTube measures CTR as a primary signal for recommending videos, and the thumbnail is the dominant visual element that drives click decisions.
What makes this particularly relevant for AI image generation is that great thumbnails require rapid iteration. The best YouTube creators do not design one thumbnail and publish it. They generate multiple concepts, compare them, test variations, and sometimes swap thumbnails after publishing based on performance data. AI image generators make this iteration cycle dramatically faster and cheaper.
What makes a great YouTube thumbnail:
- Bold, high-contrast colors that stand out in a crowded feed. Thumbnails compete for attention against dozens of other videos. Vibrant colors, strong light-dark contrast, and saturated tones grab the eye.
- A clear, easily identifiable subject that communicates the video's topic at a glance. Viewers make click decisions in milliseconds. If they cannot immediately understand what the video is about from the thumbnail, they scroll past it.
- Emotional expression when featuring faces. Surprise, excitement, curiosity, and shock all drive higher CTR than neutral expressions. This is well-documented across YouTube analytics research.
- Minimal text. The thumbnail should communicate visually first. If text is included, it should be large, bold, and limited to 3-5 words maximum. The video title already provides textual context.
- Negative space for visual breathing room. Cluttered thumbnails are harder to parse at small sizes. Leave intentional empty areas that direct the eye toward the subject.
Prompt tips for generating YouTube thumbnails:
For portrait-based thumbnails:
Close-up portrait of a [subject], [emotional expression], looking
directly at camera, bright vibrant colorful background, soft studio
lighting with dramatic rim light, shallow depth of field, high
contrast, YouTube thumbnail style, clean composition with negative
space on [left/right] side. Photorealistic, ultra-high quality.
For product or object-based thumbnails:
[Product/object] hero shot, centered composition, dramatic three-point
lighting, bold color contrast between subject and background, minimal
clean background, slight low-angle perspective for impact, studio
quality, sharp detail, vibrant color grading. 16:9 aspect ratio.
Aspect ratio: Always generate at 16:9 (YouTube's standard thumbnail ratio). The minimum YouTube thumbnail resolution is 1280x720, so generate at this size or larger for maximum quality.
Style choices: Photorealistic and Digital Art styles typically produce the most effective thumbnails. Highly stylized or abstract aesthetics can work for niche content but generally reduce click-through rate compared to clear, realistic imagery.
Iteration strategy: Generate 6-10 thumbnail variations for each video. Quickly eliminate the weakest options, then compare the top 3-4 at small sizes (the actual size they will appear in YouTube feeds). The thumbnail that communicates the video's content most clearly at small scale wins.
For more on creating thumbnails and visual content for YouTube, see our AI Video for YouTube Creators Guide.
AI-generated YouTube thumbnails allow creators to rapidly iterate on concepts. Bold colors, clear subjects, and emotional expressions drive higher click-through rates -- and generating multiple variations takes minutes instead of hours.
4. Social Media Covers and Promotional Graphics
Every platform where you share video content requires platform-specific static images. Channel banners, profile covers, post images, story covers, and promotional graphics each have their own dimension requirements and visual expectations. For video creators who publish across multiple platforms, this means maintaining a library of correctly sized, brand-consistent images that needs regular updating.
Platform-specific dimensions you need to know:
| Platform | Asset | Dimensions |
|---|---|---|
| YouTube | Channel banner | 2560 x 1440 |
| YouTube | Video thumbnail | 1280 x 720 |
| Feed post | 1080 x 1080 | |
| Story / Reel cover | 1080 x 1920 | |
| Twitter/X | Header image | 1500 x 500 |
| TikTok | Video cover | 1080 x 1920 |
| Banner | 1584 x 396 | |
| Cover photo | 820 x 312 |
AI image generators let you create assets for all of these formats quickly. The key to maintaining brand consistency across platforms is using the same style descriptors, color references, and compositional elements in your prompts.
Brand consistency workflow:
- Define your brand's visual language: key colors, preferred lighting style, recurring visual motifs, typography aesthetic.
- Build a base prompt template that includes these brand elements as fixed descriptors.
- For each platform asset, modify only the subject and composition while keeping the brand descriptors constant.
- Use Image-to-Image to apply your brand's established style to generated images -- upload a reference image that exemplifies your brand aesthetic and use it to guide the generation of new assets.
This approach ensures that whether someone encounters your brand on YouTube, Instagram, TikTok, or Twitter, the visual identity is immediately recognizable.
5. Concept Art for Pre-Production
Before any video is shot or generated, there is a phase where the creative vision needs to be communicated, approved, and refined. This is where concept art becomes invaluable -- and where AI image generation excels for video creators who may not have fine art or illustration skills.
Character design concepts. If your video involves characters -- whether for animation, AI video generation, or live-action casting reference -- AI can generate detailed character visualizations from text descriptions. Describe clothing, body type, facial features, and pose, and you get a visual reference that communicates exactly what you are envisioning.
Environment and location concepts. Need to show a client what the office interior in your corporate video should look like? Want to visualize the fantasy landscape for your short film before scouting locations? Generate environment concepts that capture mood, lighting, architecture, and atmosphere.
Mood boards and color palette exploration. Generate a set of images that capture the overall visual tone of your project. This is particularly useful for pre-production meetings where the team needs to align on the "look and feel" before any detailed work begins. Ask for images in specific color palettes, lighting conditions, or atmospheric moods to explore different directions.
Client presentations and pitch decks. When pitching a video concept to a brand or client, a deck filled with AI-generated concept images is far more persuasive than text descriptions alone. The images demonstrate your creative vision in concrete terms and reduce the risk of misalignment between what you imagine and what the client expects.
Style recommendation: For concept art, use prompts that include "concept art," "digital painting," or "pre-production visualization" as style modifiers. These produce images that clearly read as creative exploration rather than finished content, which sets appropriate expectations for clients and collaborators.
6. B-Roll Reference Images
This use case bridges the gap between AI-assisted and traditional video production. Even if you are shooting video with real cameras, AI-generated reference images can dramatically improve your production process.
Shot composition guides. Generate an image that shows exactly the framing, depth of field, and subject placement you want for a specific shot. Hand this reference to your cinematographer or camera operator. It communicates more in a single glance than a paragraph of written direction.
Lighting reference. Use AI to generate images with the exact lighting setup you want to recreate on set. Show your lighting team the mood, direction, color temperature, and contrast ratio you are aiming for. This reduces setup time and ensures everyone is working toward the same visual target.
Mood and atmosphere guidance. For shoots that require a specific atmospheric quality -- fog, golden hour warmth, overcast moodiness, dramatic shadows -- a reference image sets the standard more effectively than verbal descriptions.
Placeholder images for rough edits. Before your final footage is ready, use AI-generated reference images as placeholders in your video edit timeline. This lets you plan pacing, transitions, and visual flow before the production footage is available, making the editing process more efficient once real footage arrives.
The Video Creator's AI Image Toolkit
Seedance provides four interconnected tools that form a complete image-to-video pipeline for creators. Here is what each tool does and where it fits into the video production workflow.
Seedance Image Prompt Generator
What it does: Takes your brief, casual description and transforms it into a detailed, structured prompt optimized for AI image generation. You provide a few words or sentences about what you want, and it outputs a comprehensive prompt with specific guidance on subject, composition, lighting, style, color palette, and technical details.
Why video creators love it: Prompt quality directly determines image quality, and most people write mediocre prompts when left to their own devices. The Image Prompt Generator produces prompts that are optimized for the specific styles and compositions that work well in video contexts -- clean subjects, appropriate motion space, video-friendly aspect ratios, and lighting that translates well to animated video.
Cost: 2 credits per generation.
Best for: Maintaining consistent prompt quality across an entire project. When you are generating 10-20 images for a video's storyboard, thumbnails, and first frames, running each brief description through the prompt generator ensures uniform quality across all outputs.
Try the Image Prompt Generator -->
For a comprehensive guide to getting the most from this tool, see our Image Prompt Generator Guide.
Seedance Text-to-Image
What it does: Generates images from text descriptions. You write a prompt (or use one from the Image Prompt Generator), select a style, choose an aspect ratio, and the AI creates a high-quality image matching your description.
Why video creators love it: The images you generate are already within the Seedance ecosystem, meaning they can be directly used as first frames for video generation without any exporting, downloading, re-uploading, or format conversion. This seamless handoff between image generation and video generation is the core advantage of using an integrated platform.
Best for: Creating new images from scratch -- first frames, storyboard panels, concept art, thumbnails, and any other visual that starts from an idea in your head.
For detailed prompting techniques and examples, see our Text-to-Image AI Complete Guide.
Seedance Image-to-Image
What it does: Transforms existing images through style transfer, enhancement, editing, and refinement. Upload an image and describe how you want it changed -- apply a different artistic style, adjust the lighting, modify the composition, or enhance the overall quality.
Why video creators love it: This tool bridges the gap between "close enough" and "exactly right." If a generated first frame is 80% of what you want, Image-to-Image can push it to 100%. It is also invaluable for creating matched first and last frame pairs -- generate a first frame, then use Image-to-Image to create a modified version that serves as the last frame, ensuring visual consistency across both anchors.
Best for: Refining and polishing existing images, applying brand-consistent styles to generated content, and creating paired frames for advanced video generation workflows.
Seedance Image-to-Video
What it does: Generates a video clip from a static image. Upload an image (photographed, AI-generated, or refined through Image-to-Image), write a motion prompt describing the desired camera movement and animation, and the AI produces a video clip where the scene comes to life.
Why it is the final stage: This is where all the image work pays off. The first frame you carefully designed, the storyboard panel you generated, the reference image you refined -- they all converge here, becoming living, moving video content. The quality of your input image directly determines the quality of the output video, which is why the entire image toolkit exists to support this final step.
Best for: The actual video production step. After all your planning, designing, and refining is complete, Image-to-Video is where static images become dynamic content.
For a complete walkthrough of the image-to-video process including source image selection, prompt techniques, and advanced control methods, see our Image-to-Video AI Guide and AI Image-to-Video Workflow Guide.

The Seedance image toolkit forms a complete pipeline: generate optimized prompts, create images, refine them, and animate them into video -- all within a single platform.
Complete Workflow: From Idea to Published Video
This section lays out a concrete, repeatable process for using AI image generation across your entire video production pipeline. Whether you are creating a YouTube video, a social media campaign, a client deliverable, or a personal creative project, this three-phase workflow applies.
Pre-Production Phase
Step 1: Write your concept and script. Start with the idea. What is the video about? What is the narrative arc? What are the key visual moments? You do not need a polished screenplay -- a bullet-point outline of the scenes, shots, and key messages is sufficient for this stage.
Step 2: Generate storyboard images for each scene. Take each scene from your outline and write a prompt describing the visual. Use the Image Prompt Generator to refine each prompt, then generate the storyboard frames using Text-to-Image. Keep the style consistent across all panels by using the same style modifiers in every prompt.
Step 3: Create concept art for key visual elements. Identify the most important visual elements in your video -- hero characters, key locations, critical product shots, atmospheric moments -- and generate detailed concept images for each. These serve as the visual north star for the entire project.
Step 4: Share with your team or client for approval. Compile the storyboard and concept art into a presentation or shared document. Use these AI-generated visuals to align everyone's expectations before any production resources are committed. This is where AI images save the most money -- catching creative misalignment during pre-production is orders of magnitude cheaper than catching it during production or post-production.
Production Phase
Step 5: Generate first frames for each video clip. With the storyboard and concept art approved, generate the actual first frames that will be used for AI video generation. These need to be higher quality and more carefully considered than storyboard images. Invest time in prompt refinement and iteration here -- the first frame quality directly determines the video output quality.
Step 6: Use Image-to-Image to refine and polish frames. Review each generated first frame critically. Does the lighting match your vision? Is the composition leaving appropriate motion space? Is the subject clear and well-defined? Use Image-to-Image to make targeted adjustments. You can also create matched last frames at this stage for clips where you want to control both the beginning and end of the generated video.
Step 7: Upload first frames to Image-to-Video. With your refined first frames ready, upload each one to Image-to-Video and write motion prompts that describe the desired camera movement, subject animation, and atmospheric effects for each clip.
Step 8: Generate video clips. Generate the video and review the output. For clips that do not meet your standards, iterate on the motion prompt or refine the first frame further. AI video generation is fast enough that multiple iterations are practical within a single production session.
Step 9: Review and iterate. Watch all generated clips sequentially to check for visual consistency, pacing, and narrative flow. Regenerate any clips that break the visual rhythm or do not match the quality of surrounding clips. The goal is a collection of clips that feel like they belong together in a single video.
Post-Production Phase
Step 10: Generate thumbnails for the final video. With the video content finalized, you know exactly what the visual highlight moments are. Generate thumbnail concepts that capture the most compelling, click-worthy frame of the video. Create 6-10 variations and select the strongest option.
Step 11: Create social media promotional graphics. Generate platform-specific promotional images: Instagram post previews, Twitter/X announcement graphics, TikTok cover frames, and any other platform where you will share the video. Use your brand's visual language and style consistently across all platforms.
Step 12: Design platform-specific covers. Create or update channel banners, series covers, and playlist thumbnails that incorporate visuals from the new video. This keeps your channel looking fresh and signals new content to returning viewers.
The complete video creator workflow spans three phases: pre-production planning with storyboards and concept art, production with first frames and AI video generation, and post-production with thumbnails and promotional graphics.
5 Prompt Templates for Video Creators
These are copy-paste ready prompts designed specifically for video production use cases. Each template includes the elements that matter most for video creators: clean composition, appropriate motion space, and styles that translate well to both static images and animated video.
1. Video First Frame -- Cinematic Portrait
Medium close-up portrait of a [age] [ethnicity] [gender] with
[hair description] and [clothing description], looking slightly off
camera to the right, soft golden hour sunlight illuminating the face
from the left side, warm amber tones, shallow depth of field with
a softly blurred urban background, subtle rim light on the right
shoulder, natural skin texture, cinematic color grading with lifted
shadows, 16:9 aspect ratio, leaving negative space on the right side
of the frame for camera pan movement. Photorealistic, high resolution,
film grain texture.
Best for: Character-driven videos, interview setups, personal brand content, social media creator videos. The off-center composition and right-side negative space are designed for a slow camera pan that reveals more of the environment.
2. Video First Frame -- Product Hero Shot
[Product name/type] centered on a clean, minimal surface, dramatic
three-point studio lighting with a strong key light from the upper
left, soft fill from the right, and a subtle backlight creating rim
illumination on the product edges, [brand color] gradient background
transitioning from dark at the top to slightly lighter at the bottom,
the product occupies 60% of the frame leaving breathing room on all
sides, crisp sharp focus on the product with subtle reflection on the
surface below, professional product photography style, 16:9 aspect
ratio, high-end commercial aesthetic. Ultra-high resolution, studio
quality.
Best for: Product reviews, unboxing videos, e-commerce content, and commercial productions. The centered composition with surrounding negative space allows for zoom-in motion or slow rotation effects when animated. For more on AI video for e-commerce, see our AI Video for E-Commerce Guide.
3. YouTube Thumbnail -- Reaction/Surprise
Close-up face of a [age] [gender] with mouth open in genuine surprise,
eyes wide, eyebrows raised high, hands touching the sides of the face,
extremely vibrant saturated [color] background with subtle radial
gradient, bright and even lighting on the face with no harsh shadows,
the subject fills approximately 70% of the frame, extra space on the
[left/right] side for text overlay, pop art influenced color grading
with boosted saturation, sharp focus on the eyes and expression,
1280x720 pixels, YouTube thumbnail style with maximum visual impact
at small display sizes.
Best for: Vlog thumbnails, reaction content, challenge videos, and any content where emotional engagement drives clicks. The bold colors and exaggerated expression are optimized for YouTube's small thumbnail display size where subtlety is invisible.
4. Storyboard Frame -- Action Scene
Dynamic low-angle shot of a [subject] in mid-action [specific action
description], motion blur on the extremities suggesting rapid movement,
dramatic side lighting with deep shadows and bright highlights creating
high contrast, [environment description] visible in the background,
the subject is positioned in the left third of the frame with the
action direction moving toward the right, digital illustration style
with bold linework, slightly desaturated color palette with one
[accent color] element standing out, cinematic widescreen composition,
concept art aesthetic suitable for a pre-production storyboard.
Best for: Storyboarding action sequences, fight scenes, chase sequences, and any video content that involves dynamic physical movement. The illustration style clearly communicates that this is a planning document, and the compositional choices (rule of thirds, directional motion) translate directly into camera direction for the actual shoot or AI video generation.
5. Social Media Cover -- Brand Aesthetic
Abstract atmospheric composition in [brand's primary color] and
[brand's secondary color] color palette, smooth gradient transitions
between colors, subtle geometric [shapes/patterns] overlaid at low
opacity, soft ambient glow emanating from the center, clean minimal
design with large areas of visual breathing room, the [left/center/right]
area is intentionally empty for logo or text placement, modern
corporate aesthetic with artistic sensibility, soft diffused lighting,
no harsh edges or abrupt transitions, [specific aspect ratio based on
platform dimensions], premium brand aesthetic. Ultra-clean, high
resolution.
Best for: YouTube channel banners, Twitter/X headers, LinkedIn covers, and any platform-specific banner image. The intentional empty space accommodates text and logo placement, and the abstract design prevents the image from competing with overlaid text for visual attention.
Tips for Video Creators Using AI Images
These are practical lessons learned from working with AI image generators in video production contexts. They address the specific challenges and opportunities that video creators face, as distinct from general AI image generation advice.
1. Maintain style consistency across a project. This is the most common mistake video creators make with AI images. When generating storyboard frames, first frames, and thumbnails for the same video, use the same style descriptors, color palette references, and lighting descriptions in every prompt. Without this discipline, your collection of images will look like they were pulled from ten different sources, undermining the visual coherence of your project.
2. Always generate at the correct aspect ratio for your target platform. It sounds obvious, but generating a square image when you need 16:9 for YouTube means either cropping (losing content) or distorting (degrading quality). Set the aspect ratio before you generate, not after. For multi-platform content, generate separate images for each target ratio rather than trying to crop one image to fit multiple formats.
3. Iterate on images before moving to video generation. Time spent refining your first frame is the highest-ROI activity in the entire AI video workflow. A slightly better first frame produces a significantly better video. Spend 10-15 minutes perfecting your first frame rather than rushing to video generation and spending an hour iterating on unsatisfying video outputs.
4. Build a prompt library for your recurring image needs. If you produce weekly YouTube videos, you need thumbnails every week. If you produce branded social content, you need platform-specific graphics regularly. Save your best-performing prompts in a document organized by use case (thumbnails, first frames, storyboards, social covers) and reuse them as starting templates for future projects. For more on building effective prompts, see our AI Image Prompts Examples Guide.
5. Use Image-to-Image to create matched first and last frame pairs. Generate a first frame, then use Image-to-Image to create a variation that represents the end state of your video clip. You might change the subject's pose, shift the camera angle, adjust the lighting to suggest time passing, or modify the environment. Because both frames originate from the same base, they maintain visual consistency while defining a clear motion trajectory for the AI video generator. This technique is covered in depth in our First & Last Frame Guide.
6. Generate more options than you need. Selection is almost always faster than iteration. If you need one thumbnail, generate eight. If you need five storyboard frames, generate two options for each. The marginal cost of generating additional options is minimal -- a few credits and a few minutes -- but having a selection to choose from dramatically increases the quality of your final picks. You see possibilities you would not have imagined, and comparison makes quality differences immediately visible.
7. Credit and disclose AI usage per platform guidelines. YouTube, TikTok, Instagram, and other platforms have evolving policies around AI-generated content disclosure. YouTube requires creators to disclose when realistic-looking content is AI-generated. TikTok requires AI content labels. Staying compliant protects your channel and builds audience trust. Check each platform's current AI content policy before publishing, and err on the side of transparent disclosure.
Frequently Asked Questions
What is the best AI image generator for video creators?
The best AI image generator for video creators is one that integrates directly with a video generation pipeline. Standalone image generators like Midjourney or DALL-E produce excellent images, but you then need to download them, upload them to a separate video generation tool, and manage format compatibility. Seedance combines image prompt generation, text-to-image, image-to-image, and image-to-video into a single platform, which means your generated images flow directly into video production without any manual file management. For a comprehensive comparison of all leading image generators including standalone and integrated options, see our Best AI Image Generators 2026 comparison.
Can I use AI-generated images as first frames for video generation?
Yes, and this is arguably the most valuable use of AI image generation for video creators. When you use an AI-generated image as a first frame, you define the subject, composition, lighting, and mood of your video with precision. The AI video generator then only needs to add motion, which produces more controlled, predictable results than text-to-video generation alone. Seedance is specifically designed for this workflow -- images generated in the platform can be used as first frames for video generation without any downloading or re-uploading. See our First & Last Frame Guide for detailed techniques.
How do I create AI storyboards?
Break your video into individual shots or scenes, write a descriptive prompt for each shot, and generate images using a consistent style across all prompts. Use the Image Prompt Generator to ensure uniform prompt quality across all scenes. Include style modifiers like "concept art" or "storyboard illustration" to give the frames a pre-production aesthetic. Arrange the generated images into a sequential grid with shot descriptions and camera notes. The entire storyboard for a short video can be created in 15-30 minutes.
What size should AI-generated thumbnails be?
For YouTube, thumbnails should be at least 1280 x 720 pixels (16:9 aspect ratio). This is YouTube's recommended minimum resolution. When generating thumbnails with AI, set the aspect ratio to 16:9 before generation rather than cropping a square or portrait image afterward. For other platforms: Instagram feed posts use 1080 x 1080, Instagram stories and TikTok covers use 1080 x 1920, and Twitter/X headers use 1500 x 500. Always generate at the target platform's native dimensions.
Can AI image generators match my brand's visual style?
Yes, with the right prompting approach. Include your brand's specific color values, lighting preferences, compositional tendencies, and aesthetic references in your prompts. For stronger brand consistency, use Image-to-Image with an existing brand image as a style reference -- the AI will apply that visual style to new content. Building a prompt template with your brand's visual language baked in ensures every generated image aligns with your established identity. Over time, refine this template based on which outputs best match your brand.
How many credits does it cost to generate images for a video project?
A typical video project using AI images across the full workflow might consume the following: 5-10 storyboard frames (1-2 credits each for prompt generation + 3-5 credits each for image generation), 3-5 first frames for video clips (same per-image cost with additional iterations), 6-10 thumbnail variations (3-5 credits each), and 3-5 social media promotional graphics (3-5 credits each). A complete project might use 60-150 credits for all image assets, depending on how many iterations you need. This is a fraction of the cost of hiring designers or licensing stock photography for equivalent assets. Check the current pricing page for exact credit costs per tool.
Are AI-generated images suitable for commercial video content?
Yes. AI-generated images are used in commercial video production across advertising, e-commerce, social media marketing, and content creation. The images you generate on Seedance are yours to use commercially per the platform's terms of service. The key considerations for commercial use are quality (ensure the images meet your professional standards), disclosure (follow each platform's AI content labeling requirements), and brand alignment (maintain visual consistency with your established brand identity). For commercial video workflows including e-commerce and marketing, see our guides on AI Video for E-Commerce and AI Video for Marketing and Social Media.
What is the workflow for going from AI image to AI video?
The complete pipeline is: (1) Describe your image concept briefly, (2) use the Image Prompt Generator to create an optimized, detailed prompt, (3) generate the image using Text-to-Image, (4) refine the image if needed using Image-to-Image, (5) upload the finalized image to Image-to-Video, (6) write a motion prompt describing the desired camera movement and animation, and (7) generate the video. On Seedance, steps 2 through 7 all happen within the same platform, which eliminates file management overhead and format compatibility issues. For the complete workflow walkthrough, see our AI Image-to-Video Workflow Guide.
Start Creating Images for Your Next Video
Every video starts with an image -- a concept, a storyboard frame, a first frame, a thumbnail. AI image generators have made it possible for every video creator to produce all of these assets quickly, affordably, and at professional quality, regardless of their graphic design skills or budget.
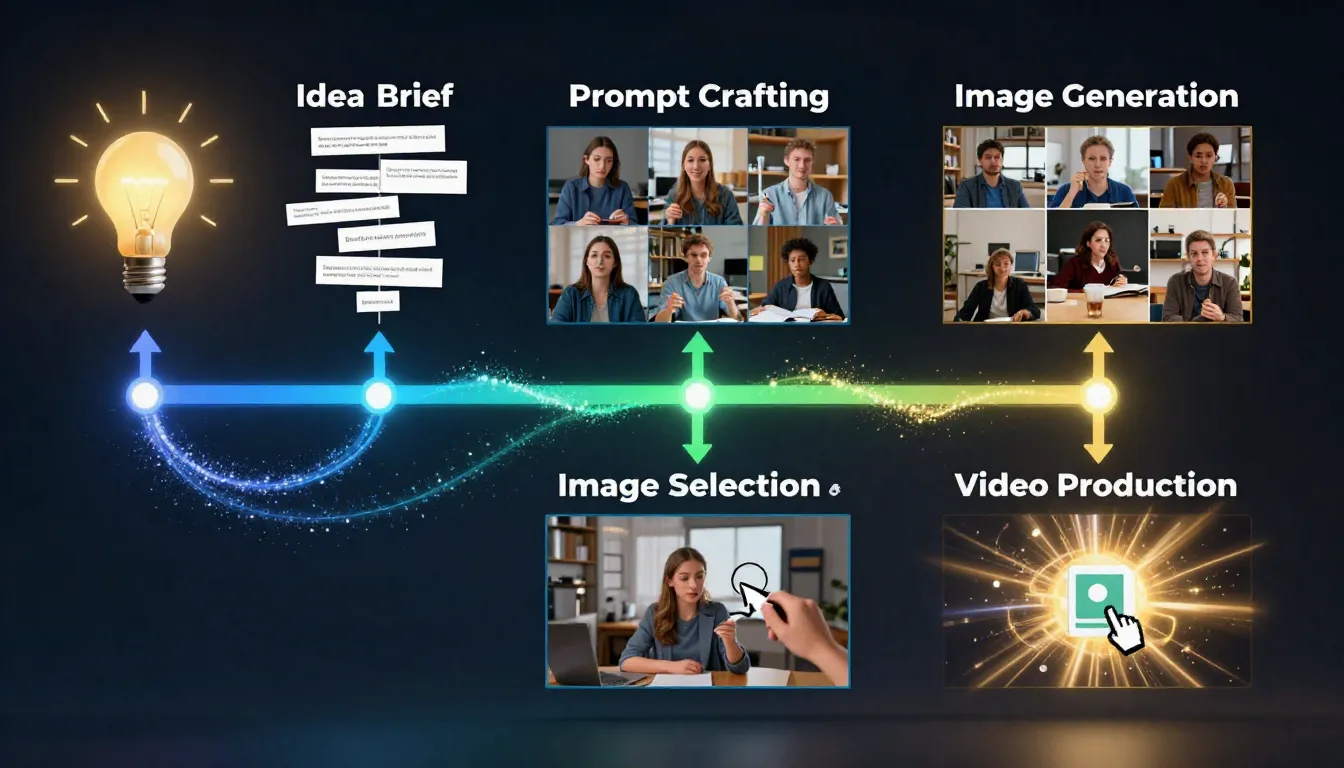
The real power is not just in generating individual images. It is in the complete pipeline: an idea becomes a prompt, a prompt becomes an image, an image becomes a video. Seedance connects these steps into a seamless workflow where each generated asset feeds directly into the next stage of production.
Here is how to start:
Generate video-ready images --> -- create first frames, storyboard panels, concept art, thumbnails, and promotional graphics for your next video project.
Create perfect prompts --> -- turn your brief descriptions into detailed, optimized prompts that produce better images on the first generation.
Turn images into videos --> -- animate your AI-generated or refined images into dynamic video clips, completing the pipeline from concept to finished content.
Learn first frame techniques --> -- master the art of designing reference images that give you maximum control over AI video generation.