
TL;DR
Image-to-video AI transforms static images into dynamic video clips using diffusion-based machine learning models. Instead of describing a scene from scratch, you upload a photo and the AI generates realistic motion, camera movement, and temporal consistency around it. This gives you far more control over the final result than text-to-video alone. In this guide, you will learn exactly how image-to-video AI works, which images produce the best output, a five-step tutorial to create your first video, eight practical use cases with sample prompts, advanced prompt techniques for controlling motion, and an honest comparison of the best tools in 2026. Try image-to-video generation for free -->
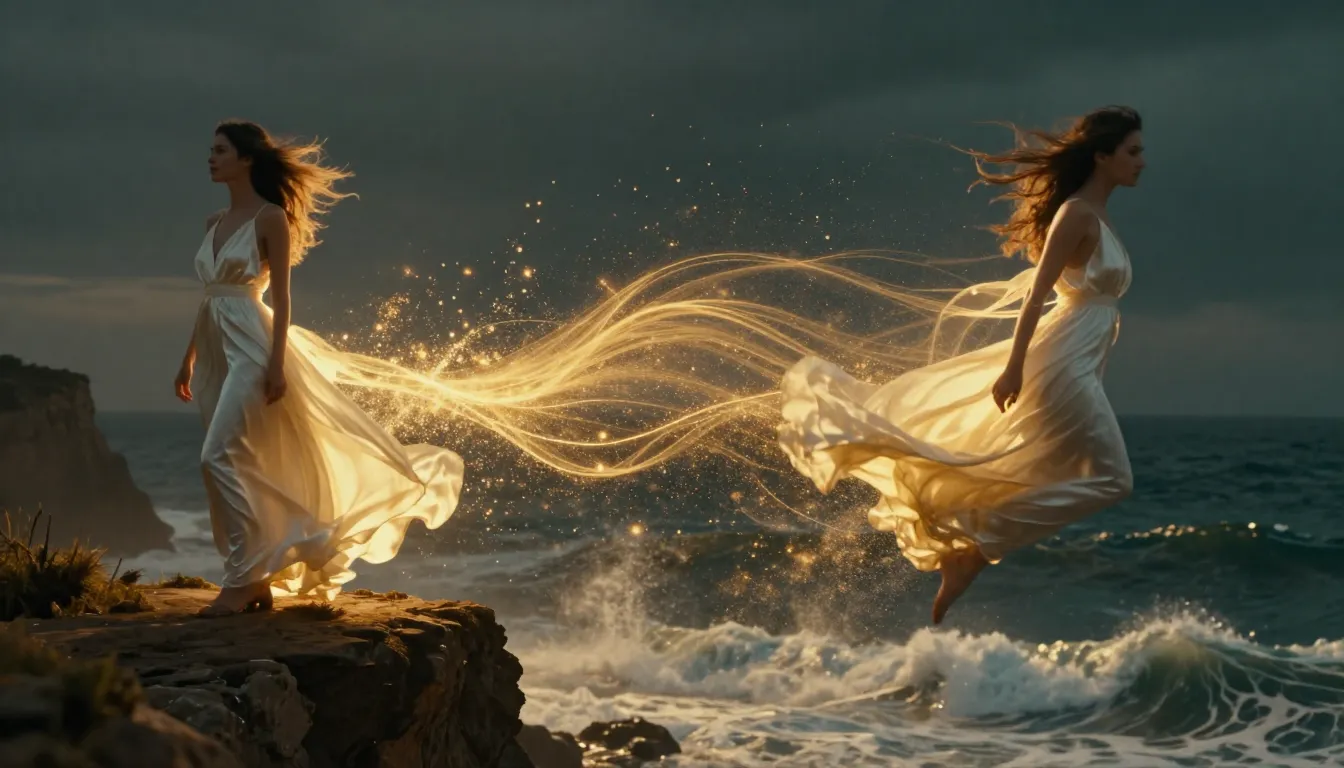
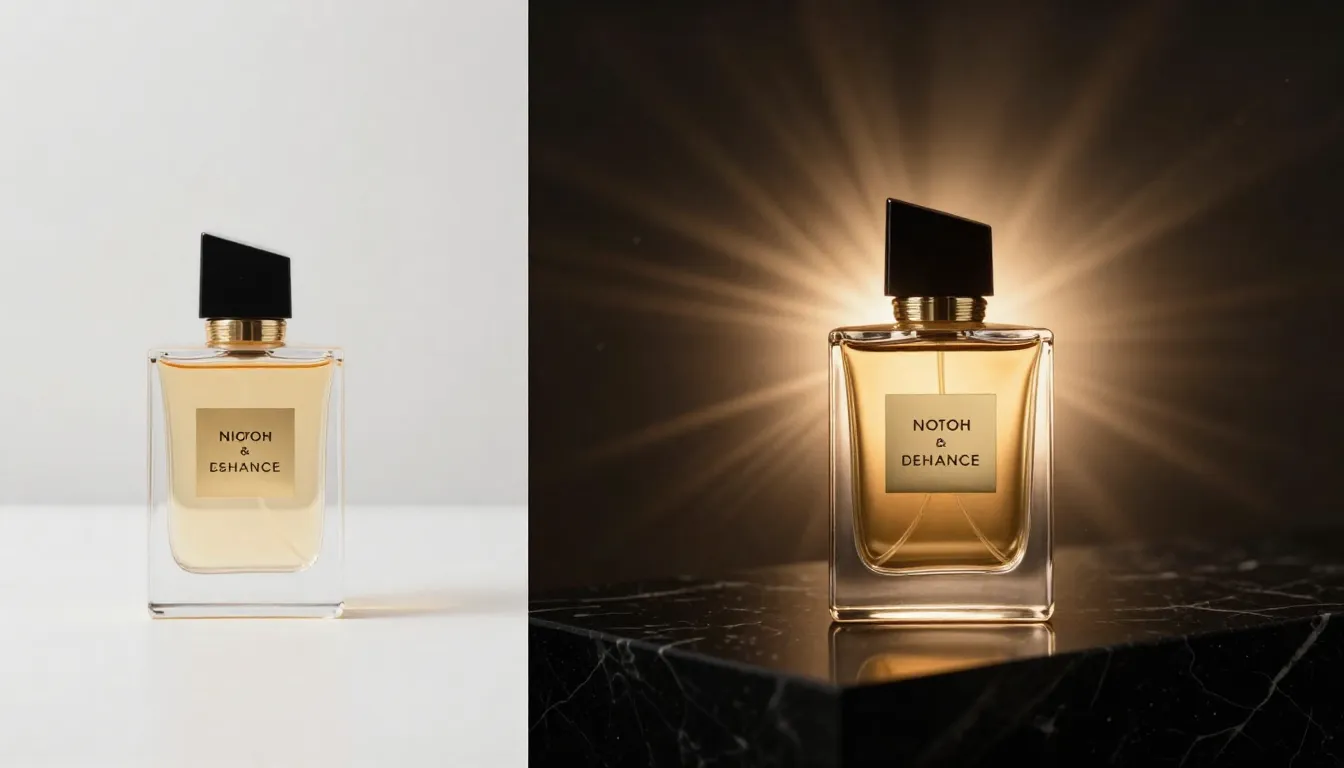
Image-to-video AI takes your static photograph and generates realistic motion, camera dynamics, and temporal consistency -- turning a single frame into a cinematic video clip.
What Is Image-to-Video AI?
Image-to-video AI is artificial intelligence technology that generates video from a static image. You provide a photograph -- a portrait, a product shot, a landscape, a piece of artwork -- and the AI model produces a short video clip where elements in the image move, the camera shifts, and the scene comes to life.
Under the hood, most image-to-video systems use video diffusion models. These are neural networks trained on millions of video-image pairs. The model learns the statistical relationship between a still frame and the motion that naturally follows. When you feed it a new image, it predicts what movement would look realistic and generates a sequence of frames that transition smoothly from your original photo.
How It Differs from Text-to-Video
Text-to-video generation starts from words alone. The AI interprets your text prompt and creates both the visual content and the motion from scratch. This is powerful but unpredictable -- the AI decides what your subject looks like, what the scene contains, and how everything moves.
Image-to-video flips the equation. You provide the visual anchor. The AI already knows exactly what the scene looks like because you showed it. Its only job is to generate plausible motion. This means:
- More control: Your image defines the subject, composition, colors, and style
- Less guesswork: The AI does not need to interpret vague descriptions
- Higher consistency: The output matches your source image closely
- Faster iteration: Adjusting motion prompts is simpler than rewriting entire scene descriptions
Why It Matters in 2026
Image-to-video AI has moved from experimental curiosity to practical production tool. E-commerce brands turn product photos into dynamic ads. Social media creators animate their best posts. Real estate agents walk clients through properties from listing photos. Educators bring textbook diagrams to life.
The technology has reached a tipping point where the output quality is genuinely useful for professional work. Videos generated from high-quality source images are often indistinguishable from traditionally filmed footage in the 5--15 second range. That is why image-to-video is now the fastest-growing category in AI video generation.
How Image-to-Video AI Actually Works
Understanding the technical process helps you get better results. When you know why the AI behaves a certain way, you can provide better inputs and write better prompts. Here is the four-step process that happens behind the scenes.
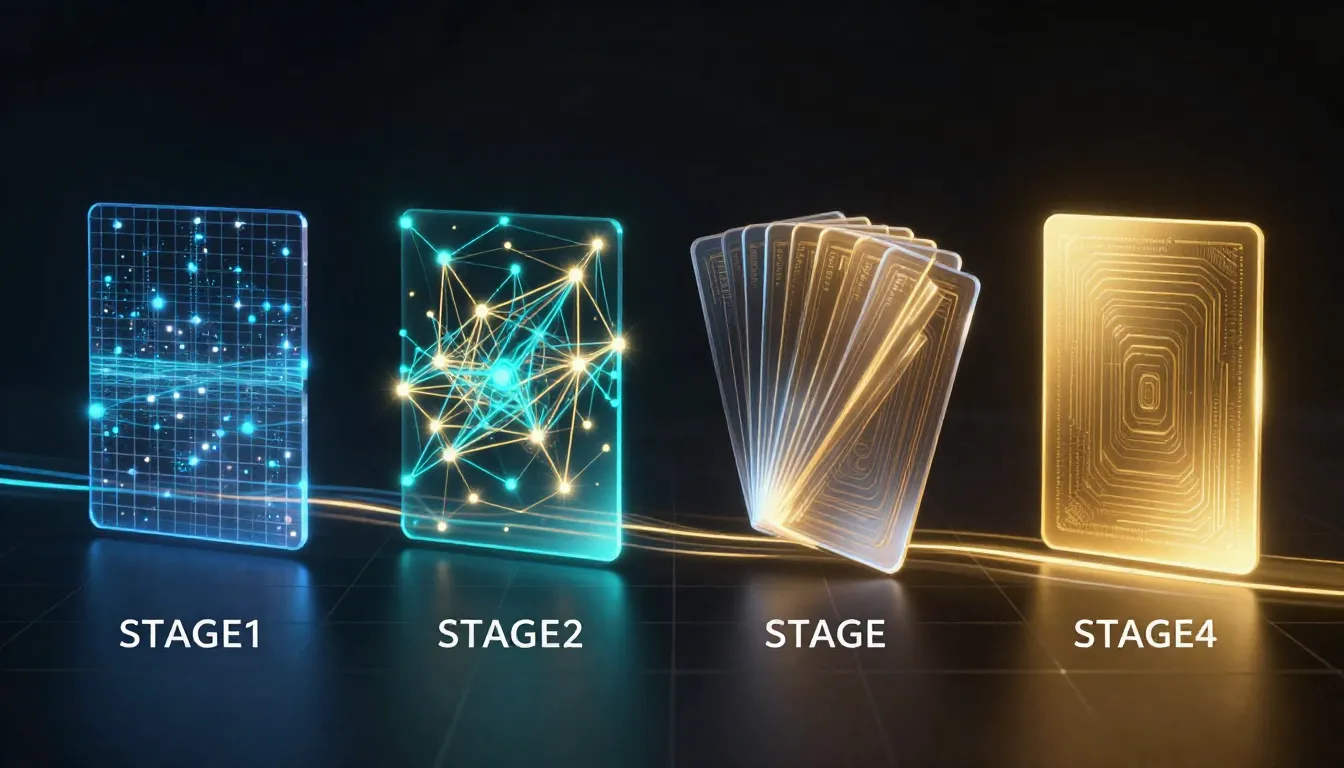
The four-step image-to-video pipeline: Image Encoding, Motion Prediction, Frame Generation, and Temporal Smoothing.
Step 1: Image Encoding
The AI first analyzes your input image using an encoder network. This compresses the image into a dense mathematical representation called a latent vector. Think of it as the AI extracting a fingerprint of your image -- capturing structure, color, depth, subject placement, lighting direction, and semantic meaning.
This latent representation is far more compact than the raw pixel data, which makes the subsequent computation tractable. The quality of this encoding directly affects the output. Higher-resolution, sharper input images produce richer latent representations, which leads to better video output.
Step 2: Motion Prediction
This is the creative core of the process. The diffusion model predicts what kind of motion would be natural given your source image. It considers:
- Scene context: A photo of an ocean implies waves should move; a portrait implies subtle facial motion
- Depth information: Objects closer to the camera can move differently than distant objects
- Physical plausibility: Hair should sway with wind, water should flow downhill, fabric should drape naturally
- Your text prompt: If you specify "slow pan left," the model adjusts its motion prediction accordingly
The model does not simply warp pixels. It generates entirely new visual content for areas that become visible due to camera movement or object motion. If the camera pans right, the model halluccinates what exists beyond the right edge of your original image.
Step 3: Frame Generation
Using the motion predictions, the model generates a sequence of video frames. Each frame is produced through the reverse diffusion process -- starting from noise and progressively refining it into a clear image that is consistent with both the previous frames and the original source image.
Modern models like those powering Seedance 2.0 generate at high frame rates (24--30 fps) and maintain sub-pixel consistency between frames. This means smooth, flicker-free output without the jittery artifacts that plagued earlier systems.
Step 4: Temporal Smoothing
The final step ensures smooth transitions between all generated frames. Temporal attention mechanisms check that brightness, color, and motion remain consistent across the full video duration. This prevents common artifacts like:
- Sudden color shifts between frames
- Objects appearing or disappearing unexpectedly
- Unnatural acceleration or deceleration of motion
- Texture flickering on surfaces
The result is a polished video clip that flows naturally from your source image.
Why Some Images Work Better Than Others
Now you can see why input image quality matters so much. A blurry, low-resolution image produces a noisy latent encoding in Step 1. This gives the motion prediction model (Step 2) less information to work with, leading to less accurate motion and more visual artifacts in the final output. Conversely, a sharp, well-composed image with clear depth cues gives the model rich information that translates into more natural, higher-quality video.
What Types of Images Work Best?
Not all images are created equal when it comes to image-to-video AI. The difference between a great source image and a poor one can be the difference between a stunning video and an unusable mess. Here is a practical guide.
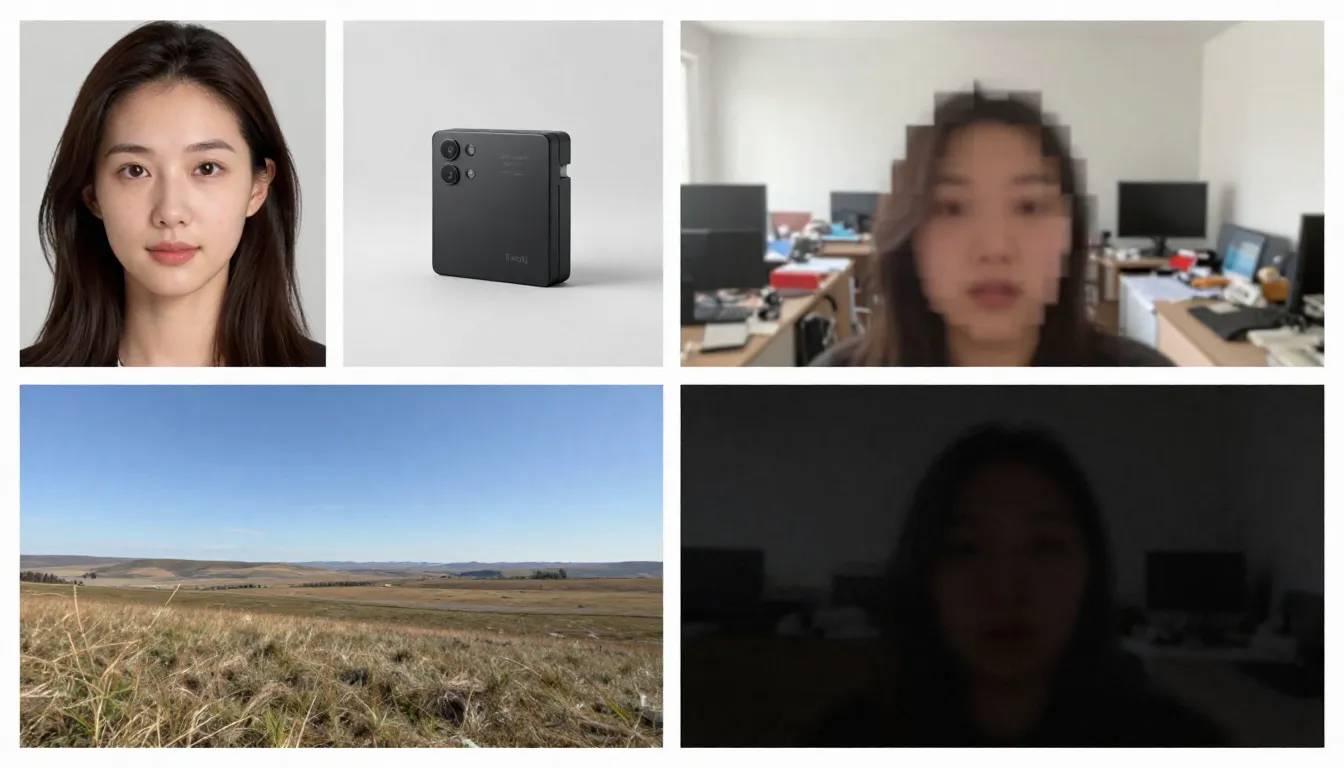
Good source images (left) are high-resolution, well-composed, and imply natural motion. Bad source images (right) are blurry, cluttered, or contain elements the AI struggles with.
Images That Work Well
High resolution (1024x1024 or larger). More pixels mean more information for the encoder. Always use the highest resolution version of your image available. Minimum recommended: 512x512 pixels. Ideal: 1024x1024 or higher.
Clear, well-defined subject. The AI needs to identify what should move and what should remain static. A portrait with a clearly separated subject and background produces better results than a chaotic group scene.
Good lighting and exposure. Well-lit images with proper exposure give the model accurate color and depth information. Avoid heavily overexposed or underexposed images.
Natural depth and composition. Images with a clear foreground, midground, and background give the AI depth cues that improve parallax effects and camera motion realism.
Implied motion. Images that suggest movement -- hair caught mid-blow, a wave about to break, a person mid-stride -- give the model a strong starting point for motion prediction. The AI understands what "should happen next" from these visual cues.
Clean backgrounds. Simple or naturally blurred backgrounds produce smoother video output than busy, cluttered backgrounds with dozens of small objects.
Images That Cause Problems
Blurry or out-of-focus images. If the source is blurry, the output will be blurry. The AI cannot add sharpness that does not exist in the input.
Overly complex scenes. Images with dozens of small subjects, intricate patterns, or visual clutter overwhelm the motion prediction model. It cannot determine what should move and how.
Heavy text or typography. AI video models still struggle with maintaining legible text across frames. If your image contains signs, logos, or text overlays, expect distortions in the video output.
Low resolution (under 512x512). Small images simply do not contain enough information. Upscaling a low-res image before feeding it to the AI does not help -- it adds pixels but not information.
Heavily filtered or edited images. Extreme color grading, HDR processing, or heavy Photoshop manipulation can confuse the model's understanding of lighting and depth.
Multiple faces at different sizes. The AI handles single-subject portraits well. Group photos with many faces at varying distances produce inconsistent animation where some faces look natural and others look distorted.
Pre-Upload Checklist
Before uploading your image, run through this quick checklist:
- Resolution is at least 1024x1024 pixels
- Subject is clearly defined and separated from the background
- Image is properly exposed (not too dark or too bright)
- No heavy filters, extreme HDR, or artificial processing
- Minimal text, logos, or typography in the image
- Scene complexity is manageable (1--3 main subjects)
- Image format is JPG, PNG, or WebP
If your image meets these criteria, you are ready to generate.
Step-by-Step: Create Your First Image-to-Video
Follow these five steps to transform any static image into a dynamic AI video. We will use Seedance as our platform, but the principles apply to any image-to-video tool.
Step 1: Choose the Right Source Image
Your source image is the single most important factor in output quality. Select an image that follows the guidelines in the previous section. For your first attempt, choose a simple portrait or a landscape with clear depth -- these categories produce the most reliable results.
Good first-try images:
- A clear headshot or half-body portrait with good lighting
- A landscape with sky, water, or foliage (elements with natural motion)
- A product photo on a clean background
- A piece of artwork or illustration with distinct elements
Avoid complex group photos, images with lots of text, or heavily edited images for your first generation.
Step 2: Upload to Seedance
Navigate to Seedance Image-to-Video and upload your chosen image. Seedance accepts JPG, PNG, and WebP formats. The platform automatically analyzes your image and prepares it for generation.
If your image is very large (over 4096 pixels on any side), it will be automatically resized while maintaining aspect ratio. There is no need to manually resize beforehand.
Step 3: Write a Motion-Focused Prompt
This is where you tell the AI what motion you want. Your prompt should describe movement, not the image content (the AI already sees the image). Focus on:
- Subject motion: What should the subject do?
- Camera motion: How should the camera move?
- Environmental motion: What ambient movement should exist?
- Pace and mood: How fast or slow should everything move?
Example prompt for a portrait:
The woman slowly turns her head to the right and smiles softly.
A gentle breeze moves her hair. Background slightly out of focus
with subtle bokeh movement. Camera slowly pushes in from medium
shot to a close-up. Warm, natural lighting. Cinematic film quality.
Example prompt for a landscape:
Gentle waves roll toward the shore in slow motion. Clouds drift
slowly across the sky from left to right. Sunlight shimmers on
the water surface. Camera slowly pans right, revealing more of
the coastline. Peaceful, serene atmosphere. 4K cinematic quality.
Example prompt for a product:
The camera slowly orbits around the product, rotating 45 degrees
clockwise. Soft studio lighting with subtle caustic reflections
on the surface. Clean white background with gentle gradient.
Premium commercial aesthetic. Smooth, steady camera movement.
The key principle: describe the motion, not the scene. The scene already exists in your image.
Step 4: Select Parameters
Configure your generation settings:
| Parameter | Recommendation | Notes |
|---|---|---|
| Model | Seedance 2.0 | Best quality for image-to-video |
| Duration | 5s (first try) | Start short, go longer once satisfied |
| Aspect Ratio | Match your image | 16:9 for landscape, 9:16 for portrait, 1:1 for square |
| Resolution | 1080p | Always use the highest available |
Pro tip: Start with a 5-second generation. If the motion and style look right, generate a longer version (8--15 seconds) with the same prompt. This saves credits during the experimentation phase.
Step 5: Generate, Review, Iterate
Click Generate and wait 1--3 minutes. When the result appears, evaluate it against these criteria:
- Does the motion feel natural and smooth?
- Does the subject maintain visual consistency throughout?
- Is the camera movement what you intended?
- Are there any visual artifacts (flickering, warping, distortion)?
- Does the video maintain the visual quality of the source image?
If anything is off, adjust your prompt and generate again. Common adjustments:
- Too fast? Add "slowly," "gently," or "gradually" to your motion descriptions
- Wrong camera movement? Be more explicit: "static camera, no camera movement" or "slow dolly in"
- Artifacts on the face? Simplify the motion: reduce the number of simultaneous actions
- Not enough motion? Add more action words: "swaying," "flowing," "drifting," "shifting"
After 2--3 iterations, you will have a polished video that brings your image to life.
Start creating your first image-to-video now -->
8 Image-to-Video Use Cases with Examples
Image-to-video AI is not a single-trick tool. It serves dozens of creative and commercial purposes. Here are eight high-impact use cases with practical prompts you can copy and adapt.
1. Portrait Animation
Let your photos come alive. Portrait animation is the most popular image-to-video use case. Upload a headshot, selfie, or character photo and add subtle lifelike motion -- breathing, blinking, head turns, facial expressions, and hair movement.
This is powerful for memorial videos, social media content, avatar creation, and creative storytelling.
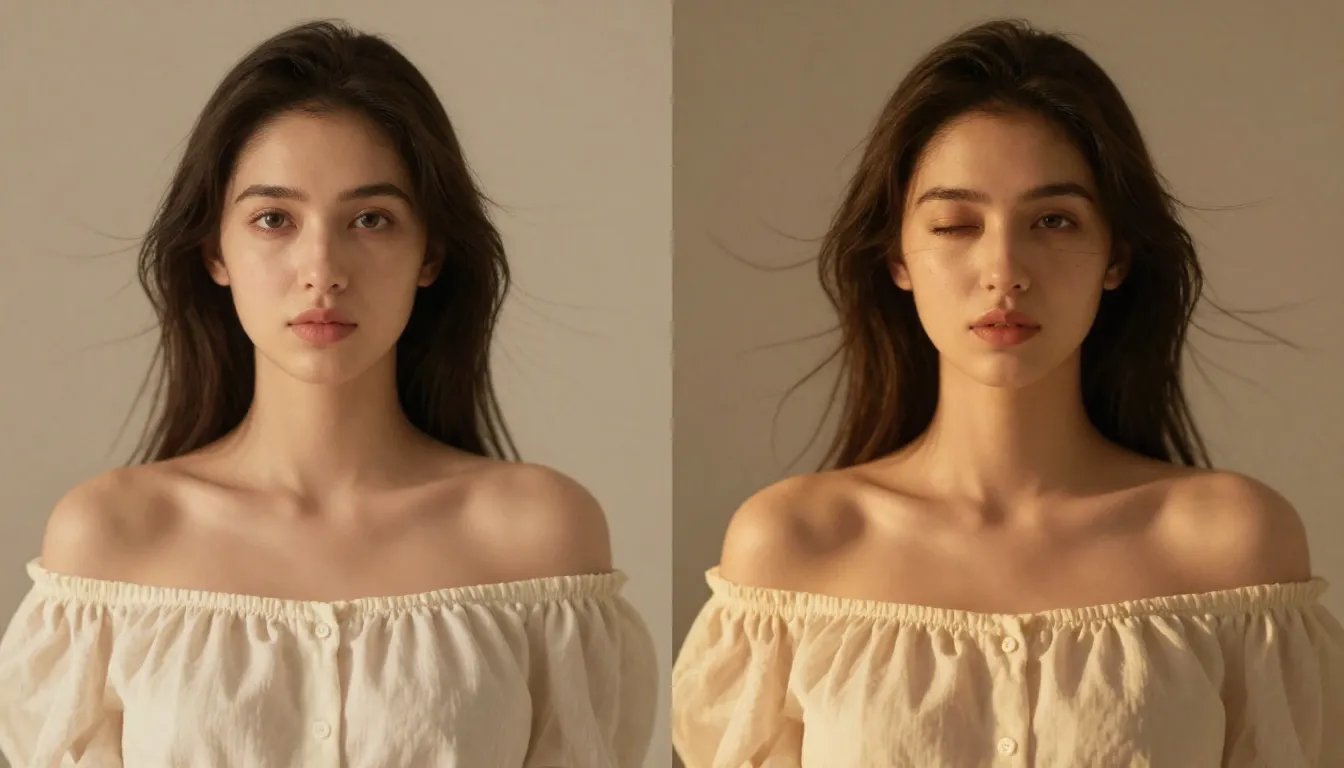
A static portrait transformed into a living video -- natural blinking, subtle head movement, and flowing hair create a surprisingly lifelike result.
Sample prompt:
The person looks directly at the camera with a calm, confident
expression. They slowly tilt their head slightly to the left and
give a subtle warm smile. Eyes blink naturally. A soft breeze gently
moves their hair. Shallow depth of field with softly blurred
background. Warm natural lighting. Cinematic portrait quality.
2. Product Showcase
Turn product photography into dynamic commercial content. This is transformative for e-commerce brands -- you already have hundreds of product photos, and now each one can become a video ad, a product page hero, or a social media clip.
A standard product photo animated into a premium commercial video -- camera orbit, dramatic lighting, and smooth motion that would cost hundreds with traditional video production.
Sample prompt:
The camera slowly orbits 90 degrees around the product, revealing
its form from multiple angles. Soft directional studio lighting
with subtle caustic reflections on the surface. A gentle highlight
sweep moves across the product. Clean, premium commercial aesthetic.
Shallow depth of field. Ultra-smooth camera movement. 4K quality.
3. Landscape Timelapse
Transform landscape photography into atmospheric timelapse-style videos. Clouds roll across skies, water flows, light shifts from golden to blue hour, and foliage sways in the wind. These are perfect for travel content, real estate establishing shots, and atmospheric B-roll.
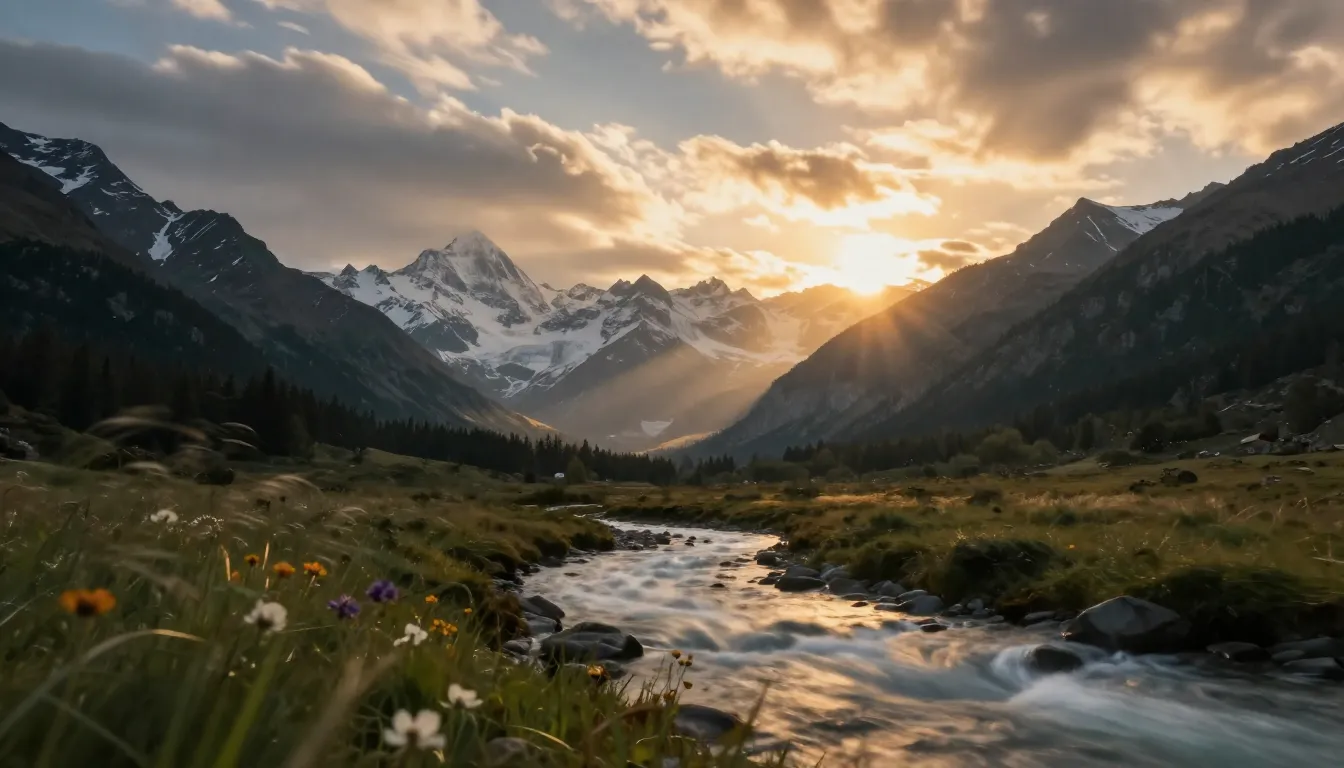
A single landscape photograph becomes a cinematic timelapse -- moving clouds, flowing water, and shifting light create dynamic atmosphere from a static image.
Sample prompt:
Time-lapse effect. Clouds move steadily across the sky from left
to right. Water in the foreground ripples and flows gently. Light
shifts subtly as if the sun is moving, creating slowly changing
shadows on the landscape. Trees and grass sway gently in the wind.
Camera remains static on a tripod. Serene, majestic atmosphere.
Cinematic landscape quality.
4. Social Media Content
Turn your best-performing static posts into scroll-stopping video content. Social platforms heavily favor video over images in their algorithms. An image that performed well as a photo post will almost certainly perform better as a video.
Sample prompt:
Dynamic, attention-grabbing motion. The subject moves confidently
toward the camera with energy and presence. Background elements
shift with parallax depth effect. Quick, punchy camera push-in
that creates impact. Vibrant colors, high contrast. Bold,
eye-catching aesthetic optimized for social media. Vertical 9:16.
5. Art and Illustration Animation
Bring artwork, illustrations, digital paintings, and graphic designs to life. This use case is popular among artists, game designers, and creative agencies who want to showcase their work in a more engaging format.
Sample prompt:
The illustrated scene comes to life with gentle, painterly motion.
Characters move subtly within their positions -- breathing, shifting
weight, small gestures. Background elements like leaves, clouds,
or particles drift slowly. The artistic style is preserved exactly
as painted. Movement is smooth and dreamlike, like a living painting.
Gentle ambient lighting shifts. Fantasy illustration quality.
6. Real Estate Virtual Tours
Transform property listing photos into walkthrough-style videos. Real estate agents can create immersive previews from existing listing photos without scheduling a videographer visit.
Sample prompt:
Smooth virtual walkthrough. The camera glides forward slowly into
the room, revealing the space with a wide-angle perspective.
Natural daylight streams through the windows, casting soft shadows.
Subtle dust particles float in the sunbeams. The camera pans
gently to the left, showing the full room layout. Clean, bright,
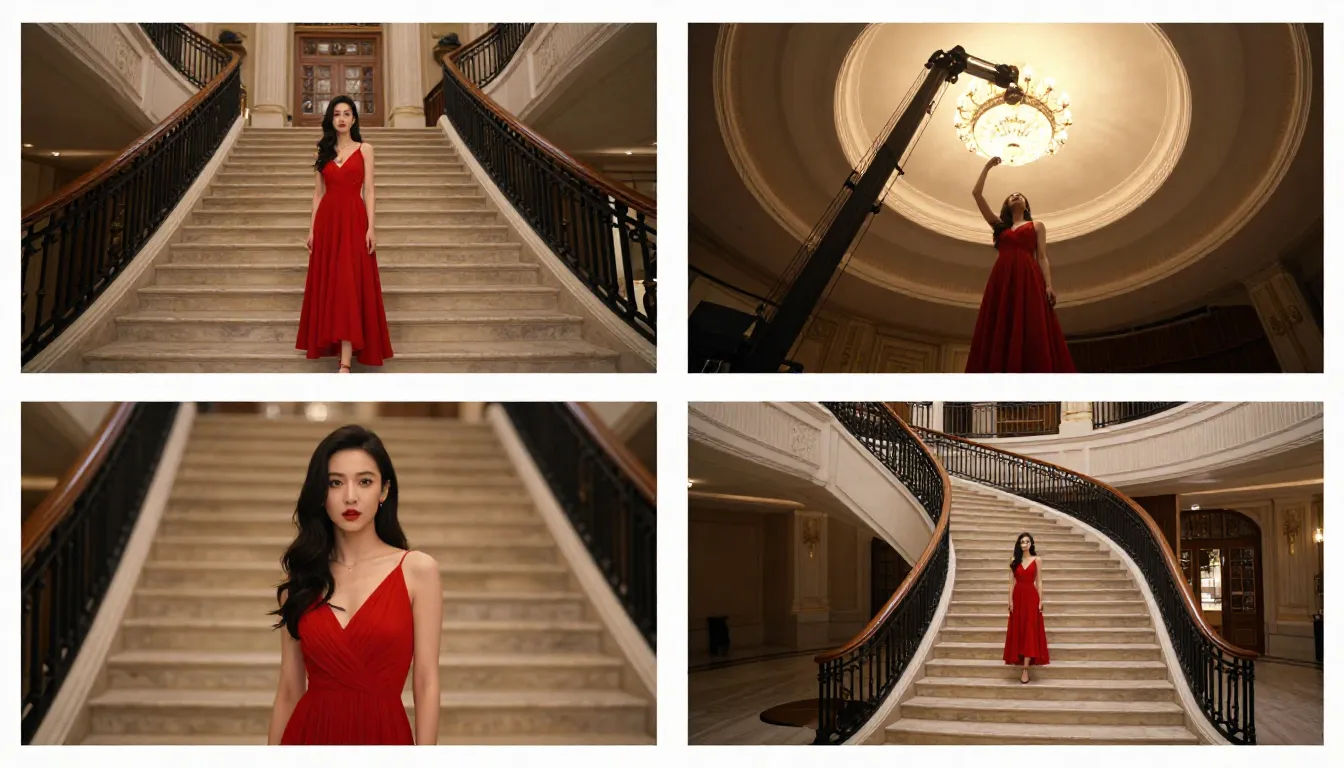
aspirational real estate aesthetic. Steady, professional movement.7. Fashion and Lookbook
Create dynamic fashion content from studio lookbook photos. Models come alive with confident movement, fabric flows naturally, and the editorial aesthetic is preserved.
Sample prompt:
The model strikes a confident pose and then slowly shifts their
weight, creating natural body movement. Fabric of the outfit
flows and catches the light with each subtle motion. Wind effect
gently moves the hair. Camera starts at full body and slowly drifts
upward to a waist-up shot. High-fashion editorial lighting with
strong directional shadows. Vogue magazine aesthetic. Cinematic
slow motion.
8. Education and Explainer Content
Transform static diagrams, infographics, and educational illustrations into animated demonstrations. Complex concepts become easier to understand when they move.
Sample prompt:
The diagram elements animate sequentially. Arrows begin to flow
in their indicated directions. Labels fade in one by one. Moving
parts of the system activate in logical order, showing the process
step by step. Smooth transitions between stages. Clean, clear
educational style. Elements highlight with subtle glow as they
become active. Professional presentation quality.
Best Image-to-Video Prompt Techniques
Writing good prompts is the highest-leverage skill for image-to-video generation. Since the AI already sees your image, your prompt should focus entirely on motion and dynamics. Here are the techniques that produce the best results.
Motion Keywords Reference
Use these specific keywords to control exactly how your video moves.
| Motion Type | Keywords | Effect |
|---|---|---|
| Camera: Forward | dolly in, push in, move closer, approach | Camera moves toward the subject |
| Camera: Backward | dolly out, pull back, retreat, widen | Camera moves away from the subject |
| Camera: Left/Right | pan left, pan right, track left, track right | Camera rotates or slides horizontally |
| Camera: Up/Down | tilt up, tilt down, crane up, crane down | Camera rotates or rises/descends vertically |
| Camera: Circular | orbit, revolve, rotate around, arc | Camera circles around the subject |
| Camera: Zoom | zoom in, zoom out, focal length shift | Lens zooms without camera movement |
| Subject: Subtle | breathe, blink, shift weight, micro-movements | Minimal lifelike motion |
| Subject: Moderate | turn head, smile, gesture, walk slowly | Clear but controlled movement |
| Subject: Dynamic | run, jump, dance, spin, wave | Energetic full-body motion |
| Environment: Gentle | breeze, drift, sway, ripple, shimmer | Soft ambient motion |
| Environment: Active | blow, rush, crash, swirl, cascade | Strong environmental dynamics |
| Parallax | parallax, depth shift, layers move | Foreground/background move at different speeds |
Different camera movement keywords produce distinctly different results. Choose your camera motion deliberately for the effect you want.
Speed and Tempo Control
The pace of motion dramatically affects the mood of your video. Use these modifiers:
- Very slow: "barely perceptible," "ultra-slow motion," "glacial pace" -- dramatic, contemplative
- Slow: "slowly," "gently," "gradually," "leisurely" -- elegant, cinematic
- Moderate: "steady," "natural pace," "at walking speed" -- realistic, documentary
- Fast: "quickly," "briskly," "energetically," "swift" -- dynamic, exciting
- Very fast: "rapid," "whip pan," "quick cut," "burst of motion" -- intense, action-oriented
Pro tip: Default to slow motion. Slow movement almost always looks better in AI-generated video than fast movement. Fast motion increases the chance of artifacts and visual inconsistencies.
Background vs. Subject Motion
You can independently control what moves and what stays still. This is a powerful technique for directing attention.
Subject moves, background static:
The person walks forward confidently while the background remains
perfectly still. Static camera, no camera movement. Focus entirely
on the subject's motion.
Background moves, subject static:
The person stands completely still, like a statue. Behind them,
clouds drift across the sky, leaves blow in the wind, and city
lights flicker. Only the environment moves.
Both move independently:
The person slowly turns their head while the camera simultaneously
dollies in. Background clouds drift in the opposite direction,
creating a sense of depth and dimension.
Camera Motion vs. Object Motion
Understanding the difference between camera motion and object motion is critical for getting the results you want.
Camera motion changes the perspective and framing. The scene stays in place while the viewpoint shifts. Use this for: reveals, establishing shots, dramatic emphasis.
Object motion moves elements within the scene while the camera stays put. Use this for: character animation, product showcases, natural environment motion.
Combined motion uses both simultaneously. This is the most cinematic approach but also the hardest for the AI to execute well. Start with one type of motion and add the other only after you are happy with the base result.
Advanced Prompt Structure
For the most predictable results, structure your prompt in this order:
- Subject action -- what the main subject does
- Camera motion -- how the camera moves
- Environmental motion -- what ambient elements do
- Speed/tempo -- how fast everything moves
- Atmosphere/mood -- the emotional tone
- Quality modifiers -- technical quality descriptors
Example using this structure:
[Subject] A young woman in a flowing white dress slowly raises
her hand to brush hair from her face.
[Camera] The camera executes a slow, steady dolly in from a
medium shot to a close-up.
[Environment] Cherry blossom petals drift gently through the
air. Soft golden sunlight filters through the trees.
[Speed] All motion is slow and deliberate, almost dreamlike.
[Mood] Romantic, ethereal, peaceful atmosphere.
[Quality] Cinematic shallow depth of field, anamorphic bokeh,
film grain, 4K quality.
Best Image-to-Video AI Tools Compared (2026)
The image-to-video space has become competitive. Here is an honest comparison of the leading platforms as of February 2026.

The same source image processed through five different image-to-video platforms. Differences in motion quality, temporal consistency, and visual fidelity are immediately visible.
| Feature | Seedance 2.0 | Runway Gen-4 | Pika 2.0 | Kling 3.0 | Luma Dream Machine |
|---|---|---|---|---|---|
| Max Resolution | 2K (2048x1080) | 4K (upscale) | 1080p | 1080p | 1080p |
| Max Duration | 15s | 10s | 5s | 2 min | 5s |
| Input Options | Image + Text + Video + Audio | Image + Text + Video | Image + Text | Image + Text | Image + Text |
| Multi-Image Input | Yes (up to 9) | No | No | No | No |
| Native Audio | Yes (8-lang lip sync) | No | Partial (SFX) | No | No |
| Camera Controls | Prompt-based | Motion Brush + Director Mode | Basic | Basic | Prompt-based |
| Free Tier | Yes (free credits) | Yes (limited) | Yes (limited) | Yes (limited) | Yes (limited) |
| Starting Price | ~$9.90/mo | $15/mo | $10/mo | ~$6.99/mo | $9.99/mo |
| Best For | Multi-modal control, quality | Professional editing workflows | Beginners, fun effects | Long duration, budget | Cinematic, 3D scenes |
Key Takeaways
Seedance 2.0 leads in input flexibility. It is the only platform that accepts up to 9 reference images simultaneously, supports audio input for lip sync, and combines all input modes in a single generation. If you want the most control over your image-to-video output, Seedance offers the broadest toolkit. The 2K resolution output is also the highest available among tools that do not rely on upscaling.
Runway Gen-4 excels in precision control. The Motion Brush lets you paint exactly which parts of your image should move and in what direction. If you need surgical control over specific regions, Runway is the strongest option. The downside is higher pricing and lower generation quotas.
Pika 2.0 is the easiest to learn. For beginners who want to try image-to-video without learning prompt engineering, Pika's one-click effects and simple interface make it the lowest-barrier option. Quality is lower than premium tools but adequate for casual social content.
Kling 3.0 dominates on duration and value. If you need a long video from a single image -- 30 seconds, a minute, even two minutes -- Kling is the only realistic option. The price-to-quality ratio is excellent. The trade-off is limited input options (single image + text only).
Luma Dream Machine shines in spatial understanding. For landscape, architecture, and any scene where three-dimensional space matters, Luma produces the most convincing parallax and camera motion. Human animation is weaker than competitors.
For a broader comparison including text-to-video capabilities, see our complete AI video generator comparison.
Common Mistakes and How to Fix Them
After testing thousands of image-to-video generations, these are the five most common mistakes we see -- and exactly how to fix each one.
1. Using a Low-Resolution Source Image
The mistake: Uploading a small, compressed image (e.g., a 400x300 thumbnail saved from social media) and expecting HD video output.
Why it fails: The encoder cannot extract enough visual information from a low-res image. The output inherits the blurriness and adds motion artifacts on top.
The fix: Always use the highest resolution version of your image. If you only have a small version, use an AI upscaler (like Real-ESRGAN or Topaz Gigapixel) to increase resolution before uploading. Minimum 1024x1024 pixels recommended.
2. Writing Scene Descriptions Instead of Motion Descriptions
The mistake: Writing prompts like "A beautiful sunset over the ocean with golden light reflecting on the water." This describes what the image looks like -- which the AI already knows.
Why it fails: The AI has already encoded the image. Describing the image back to it wastes your prompt on redundant information and gives no motion direction.
The fix: Focus your prompt entirely on motion. Instead, write: "Waves roll gently toward shore. Golden sunlight shimmers on the water surface. Clouds drift slowly from left to right. Camera pans slowly to the right, following the coastline."
3. Requesting Too Many Simultaneous Actions
The mistake: "The person turns their head, waves, walks forward, picks up a cup, smiles, and dances while the camera zooms in, pans left, and tilts down."
Why it fails: Current AI models cannot reliably coordinate more than 2--3 simultaneous actions. Overloading the prompt causes the model to either ignore most instructions or produce chaotic, artifact-heavy output.
The fix: Limit yourself to one primary subject action and one camera movement per generation. If you need a complex sequence, generate multiple short clips and edit them together.
4. Ignoring Aspect Ratio Mismatch
The mistake: Uploading a wide landscape photo (16:9) but setting the output to 9:16 vertical, or vice versa.
Why it fails: The AI needs to either crop your image dramatically or fill in large missing areas. Both approaches produce subpar results -- cropping loses your carefully composed image, and hallucinating large new areas introduces inconsistencies.
The fix: Match your output aspect ratio to your source image's aspect ratio. If your image is landscape, generate in 16:9. If it is portrait, generate in 9:16. If you need a different ratio, crop your source image first to the target aspect ratio before uploading.
5. Expecting Photorealistic Results from Illustrations
The mistake: Uploading a cartoon illustration or flat graphic design and expecting the AI to generate photorealistic video motion.
Why it fails: The model tries to interpret the artistic style and sometimes adds unwanted realism. Flat illustrations lack the depth and lighting cues that the model uses for natural motion prediction.
The fix: If your source is an illustration, explicitly state the style in your prompt: "Maintain the illustrated art style exactly. Animated in a 2D animation style, not photorealistic. Movement should feel hand-drawn and painterly." This tells the model to preserve the artistic style rather than adding realism.
Frequently Asked Questions
What is the best AI tool to turn images into videos?
Seedance 2.0 is our top recommendation for image-to-video generation in 2026. It supports multi-image input (up to 9 reference images), produces 2K resolution output, and offers the most flexible combination of image, text, video, and audio inputs. For budget-conscious users, Kling 3.0 offers excellent quality at a lower price point. For beginners, Pika 2.0 has the simplest interface. The best choice depends on your specific needs -- see our comparison table above.
Can I turn a photo into a video for free?
Yes. Several platforms offer free tiers for image-to-video generation. Seedance provides free credits to every new user -- no credit card required. Pika 2.0 and Luma Dream Machine also offer limited free generations. HaiLuo AI provides 10 free generations per day. The free tiers are sufficient for testing the technology and creating a handful of videos. For regular production use, a paid plan is more cost-effective. See our free AI video guide for strategies on maximizing free credits.
How long can an AI image-to-video be?
Duration varies by platform. Kling 3.0 leads with up to 2 minutes from a single image. Seedance 2.0 generates up to 15 seconds. Runway Gen-4 maxes at 10 seconds. Pika 2.0 and Luma Dream Machine cap at 5 seconds. For most social media and marketing use cases, 5--15 seconds is the sweet spot. If you need longer videos, generate multiple clips and edit them together, or use Kling for extended single-shot generation.
What image format works best for AI video generation?
PNG is the best format because it is lossless -- no compression artifacts. WebP (lossless mode) is equally good with smaller file sizes. JPG works fine for most use cases, but heavily compressed JPGs with visible compression artifacts will reduce output quality. Avoid GIFs, BMPs, or other uncommon formats. All major platforms accept JPG, PNG, and WebP. Minimum resolution: 512x512 pixels. Recommended: 1024x1024 or higher.
Can AI animate any type of image?
AI can animate most types of images, but results vary significantly by image type. Portraits and headshots produce the best results -- natural facial motion and hair movement are well-understood by current models. Landscapes and nature scenes also work extremely well, with convincing cloud motion, water flow, and foliage sway. Product photos on clean backgrounds yield reliable results. Illustrations and artwork can be animated but may require style-specific prompting to avoid unwanted realism. Complex group scenes, images with text, and low-quality photos produce the least reliable results.
How is image-to-video different from text-to-video?
Text-to-video generates both the visual content and the motion from a text description. The AI decides what everything looks like. You have less control over specific visual details but more creative freedom. Image-to-video starts with your existing image and only generates motion. You have precise control over how the scene looks because you provided the visual reference. Image-to-video is generally more predictable and produces more consistent results because the AI has a concrete visual anchor. Text-to-video is better when you want the AI to create something entirely new.
Can I control camera movement in image-to-video?
Yes. Most modern image-to-video tools support camera movement control through text prompts. You can specify movements like "dolly in," "pan left," "orbit around," "crane up," "zoom out," and "tracking shot." Seedance 2.0 and Luma Dream Machine interpret these camera keywords particularly well. Runway Gen-4 offers additional precision through its Motion Brush and Director Mode, letting you draw camera paths visually. For best results, specify only one camera movement per generation and include speed modifiers like "slowly" or "steadily."
Is AI image-to-video good enough for professional use?
For short-form content (5--15 seconds), yes. Image-to-video output from top-tier platforms like Seedance 2.0 and Runway Gen-4 is now used professionally for social media marketing, e-commerce product videos, real estate previews, and advertising creative. Major brands and agencies have incorporated AI video into their production pipelines. However, limitations remain: longer durations increase artifact risk, complex multi-subject scenes are less reliable, and text rendering in video is still imperfect. For high-stakes broadcast or cinematic work requiring absolute perfection, traditional production remains the safer choice. For digital marketing and social content, AI image-to-video is already professional-grade.
Conclusion
Image-to-video AI has moved from novelty to necessity. The technology works, the tools are accessible, and the output quality meets professional standards for the vast majority of digital content use cases.
Here is what to remember:
- Source image quality is everything. A sharp, well-composed, high-resolution image produces dramatically better results than a blurry or low-res one.
- Prompt for motion, not description. The AI already sees your image. Tell it how things should move, not what they look like.
- Start simple. One subject action plus one camera movement. Add complexity only after you master the basics.
- Iterate quickly. Generate short test clips before committing to full-length versions.
- Match the tool to the task. Seedance for quality and multi-modal control, Kling for duration, Runway for precision editing, Pika for simplicity.
The gap between brands using image-to-video AI and those still relying on static images is widening every month. Every product photo in your catalog is a potential video ad. Every portrait is a potential animated avatar. Every landscape is a potential cinematic B-roll clip.
Create your first image-to-video for free --> -- upload any image and see it come to life in under two minutes. No credit card required.
Want to explore more AI video capabilities? Try the full Seedance platform --> for text-to-video, video-to-video, and multi-modal generation.
Related reading: How to Use Seedance: Complete Guide | Seedance Prompt Guide with 50+ Examples | AI Video Examples & Creative Use Cases | Best AI Video Generators 2026 | AI Video for Marketing & Social Media | Text to Video AI: Complete Guide