
TL;DR
Image-to-image AI transforms existing images using artificial intelligence -- applying style transfer, editing specific regions, enhancing resolution, restyling visual aesthetics, and generating variations from a single source. Unlike text-to-image (which creates visuals from scratch), image-to-image starts with your photograph or artwork and produces a modified version guided by your text prompt. It is one of the most practical AI creative tools available in 2026 because it lets you refine, restyle, and repurpose images without manual editing skills. It is also essential for preparing reference frames before AI video generation -- edit your image, then use it as a first frame to generate a cinematic video clip. This guide covers how the technology works, six core capabilities, seven tools compared, a step-by-step Seedance tutorial, eight prompt examples, and the unique image-to-video pipeline that makes image-to-image indispensable for video creators. Try Seedance Image-to-Image --> | Generate images from text -->

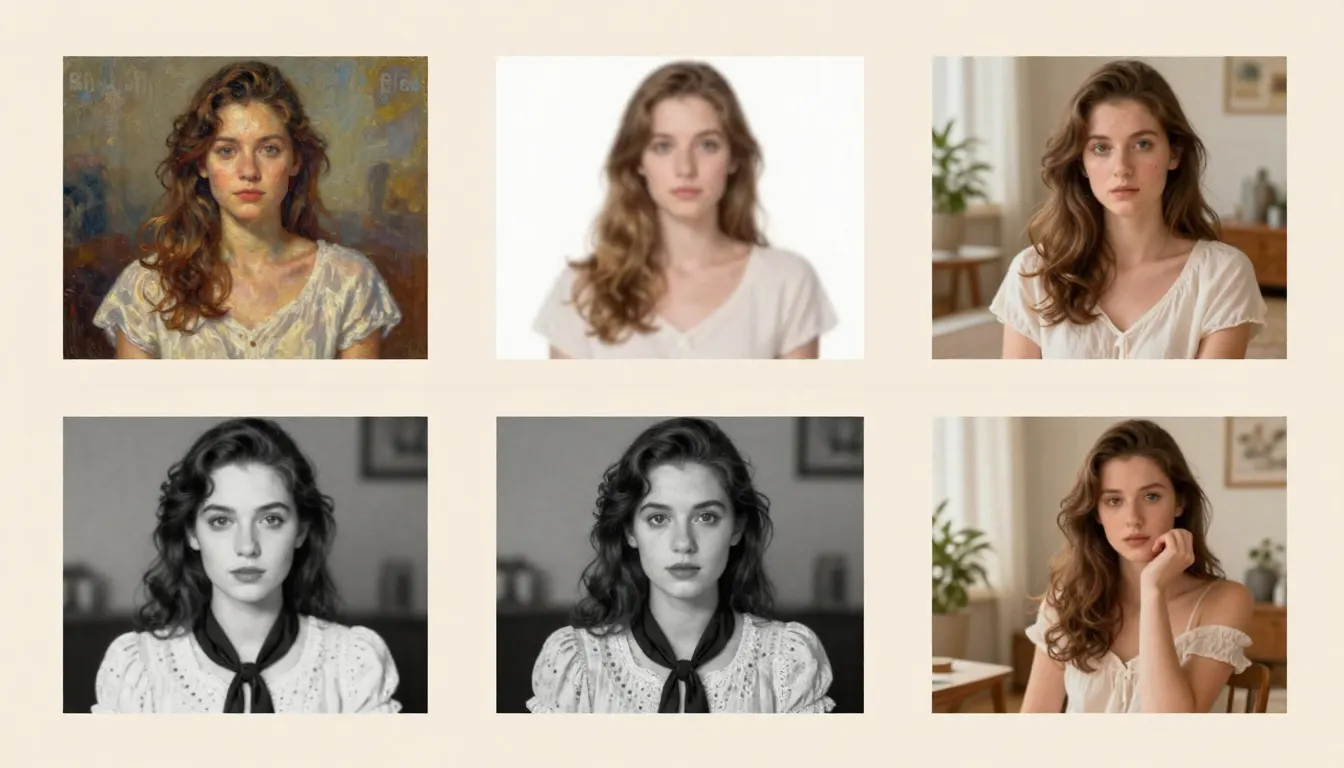
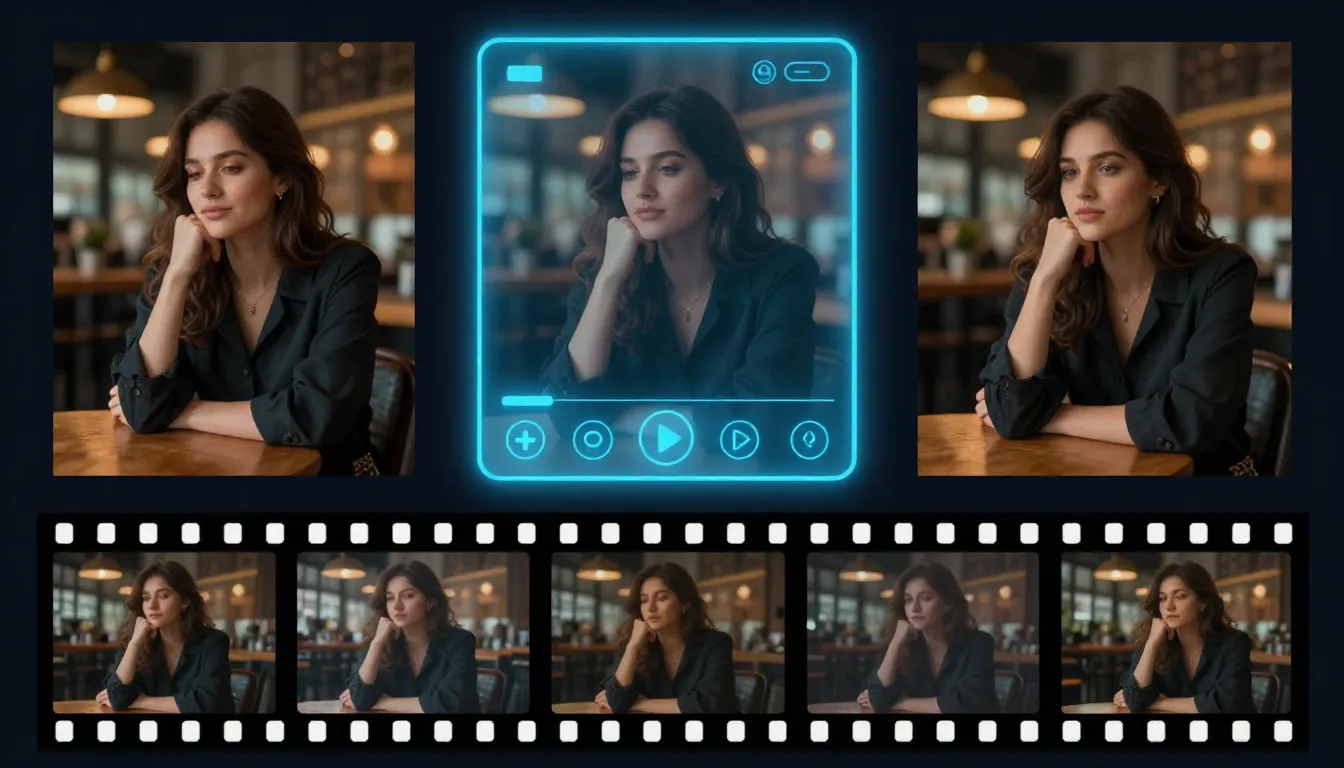
Image-to-image AI takes your existing photograph and generates transformed versions -- new styles, enhanced quality, edited regions, and extended compositions -- all guided by your text prompt.
What Is Image-to-Image AI?
Image-to-image AI is artificial intelligence technology that takes an existing image as input and generates a modified version of it. You provide a photograph, illustration, sketch, or any visual, along with a text prompt describing the desired transformation, and the AI produces a new image that reflects your instructions while preserving elements of the original.
The key distinction from text-to-image generation is the starting point. Text-to-image AI creates visuals from a written description alone -- the AI decides what everything looks like. Image-to-image starts with a concrete visual reference. The AI already knows the composition, subject placement, color palette, and spatial structure of your scene. Its job is to modify, enhance, or restyle that visual foundation according to your prompt.
Core Capabilities
Image-to-image AI is not a single feature -- it is a family of related capabilities built on the same underlying technology:
- Style transfer: Transform a photograph into an oil painting, watercolor, anime, cyberpunk, or any artistic style while preserving the original composition
- Inpainting: Edit specific regions of an image (remove objects, change backgrounds, alter clothing) while keeping the rest unchanged
- Outpainting: Extend an image beyond its original boundaries, with the AI filling in new areas seamlessly
- Enhancement and upscaling: Increase resolution, sharpen details, reduce noise, and improve overall image quality
- Variation generation: Create multiple versions of the same concept with slight differences in pose, expression, angle, or detail
- Restyling for video: Prepare and perfect reference frames before feeding them into AI video generation
Why It Matters
Before image-to-image AI, modifying an image required either manual editing skills (Photoshop, Illustrator) or commissioning a designer. Changing the style of a photograph from realistic to watercolor would take hours of skilled work. Removing an unwanted object from a complex scene required careful cloning and blending. Extending a cropped image to a wider aspect ratio was essentially impossible without starting over.
Image-to-image AI collapses these tasks into seconds. You describe what you want, and the AI handles the technical execution. This does not replace professional designers -- it gives everyone access to capabilities that previously required specialized training.
The Role in Video Production
This is the most underappreciated aspect of image-to-image AI: it is the critical bridge between static images and AI video generation. The quality of your first frame directly determines the quality of your generated video. Image-to-image lets you:
- Take a rough sketch and transform it into a polished, cinematic-grade first frame
- Adjust lighting, color grading, and style to match your target video aesthetic
- Fix imperfections in AI-generated images before using them as video references
- Convert images between aspect ratios (portrait to landscape) for video compatibility
If you are working with image-to-video AI, image-to-image is not optional -- it is the preparation step that separates amateur output from professional-quality results.
6 Things You Can Do with Image-to-Image AI
Image-to-image encompasses a broad set of creative operations. Here are the six most impactful capabilities, each with practical use cases.
1. Style Transfer
Style transfer transforms the visual aesthetic of an image while preserving its underlying composition and structure. You can convert a photograph into an oil painting, a pencil sketch into a polished digital illustration, or a realistic landscape into an anime-style scene.
The AI analyzes the structural elements of your input -- edges, shapes, depth, subject placement -- and regenerates the visual surface with an entirely different artistic style. The result maintains recognizability (it is clearly the same scene) but looks like it was created in a completely different medium.
Practical use cases:
- Creating branded content in a consistent visual style across dozens of source images
- Transforming product photography into illustrated versions for marketing materials
- Converting realistic reference photos into stylized concept art
- Generating social media content with distinctive aesthetic identity
How it works in practice: Upload a photograph of a city street. Prompt: "Transform into a Studio Ghibli anime scene. Soft watercolor textures, warm pastel colors, hand-painted feel." The AI preserves the street layout, building positions, and perspective but redraws everything in an animated art style.
2. Image Enhancement and Upscaling
Enhancement takes a low-quality image and improves it -- sharpening details, increasing resolution, reducing noise, correcting exposure, and restoring clarity. This goes beyond traditional upscaling algorithms that simply interpolate pixels. AI enhancement actually generates new visual detail that plausibly matches what should be there.
A 512x512 phone photo can become a crisp 2048x2048 image with details that did not exist in the original. The AI infers what those details should look like based on context -- if it sees a blurry eye, it generates a sharp, realistic eye with proper iris texture, reflections, and lash detail.
Practical use cases:
- Preparing low-resolution images for high-quality print production
- Restoring old or damaged photographs with modern detail
- Turning phone camera snapshots into professional-quality images
- Upscaling AI-generated images that came out at lower resolution
- Preparing reference frames for AI video generation where source images are too small
3. Inpainting (Edit Parts of an Image)
Inpainting lets you modify specific regions of an image while keeping the rest completely unchanged. You select an area (by masking, drawing, or describing the region), tell the AI what to change, and only that portion is regenerated. The surrounding pixels remain untouched.
This is the closest AI gets to surgical editing. Unlike full-image transformations that can drift from the original, inpainting preserves everything outside the edit zone perfectly. The challenge is making the edited region blend seamlessly with the untouched surroundings -- modern models handle this remarkably well with consistent lighting, texture, and perspective.
Practical use cases:
- Removing unwanted objects from photographs (people, signs, clutter)
- Changing backgrounds while keeping the subject intact
- Altering clothing, accessories, or colors on a subject
- Fixing imperfections in AI-generated images (extra fingers, distorted details)
- Correcting specific areas of a video reference frame before generation
4. Outpainting (Extend the Canvas)
Outpainting expands an image beyond its original boundaries. The AI generates new visual content that seamlessly extends the existing scene in any direction -- left, right, up, down, or all sides simultaneously. The generated extension matches the original image's perspective, lighting, style, and content.
This is particularly powerful for aspect ratio conversion. If you have a square portrait but need a 16:9 landscape version for video, outpainting can extend the left and right sides with contextually appropriate content. The AI infers what should exist beyond the frame based on the visible scene -- if the left edge shows part of a forest, the extension will continue the forest naturally.
Practical use cases:
- Converting portrait-orientation images to landscape for video use
- Expanding tightly cropped images to reveal more of the scene
- Creating panoramic versions of standard photographs
- Adjusting aspect ratios for different social media platforms (1:1 to 16:9, 4:3 to 9:16)
- Preparing wider canvases for first and last frame video generation
5. Variation Generation
Variation generation creates multiple versions of the same concept with controlled differences. From a single source image, you can produce versions with slightly different poses, expressions, angles, color palettes, or compositional details. Each variation is recognizably the same scene but offers a distinct take.
This is invaluable for iterative creative work. Instead of generating entirely new images from scratch and hoping one matches your vision, you start from an image that is already close and generate ten variations. One of them will be exactly what you need.
Practical use cases:
- A/B testing visual content for marketing campaigns
- Creating first and last frames for video (same scene, different state -- a door closed vs. open, daylight vs. sunset)
- Generating product images with slight variations for catalog diversity
- Exploring color palette options for branding without redesigning
- Producing multiple social media post options from a single reference
6. Image-to-Image for Video Frames
This is the capability that connects image-to-image AI to the broader AI video production pipeline. Video generation models like Seedance produce dramatically better results when given a high-quality, well-composed reference frame. Image-to-image is how you create that reference frame.
The workflow is straightforward: take any image (a rough sketch, an AI-generated draft, a phone photo) and use image-to-image to transform it into a polished, cinematic-grade frame. Then feed that frame into image-to-video generation to produce a professional video clip.
Why this matters: The first frame sets the visual standard for every subsequent frame the video model generates. A low-quality first frame produces a low-quality video. A cinematic first frame produces a cinematic video. Image-to-image is the tool that ensures your first frame meets that standard.
Six core capabilities of image-to-image AI -- from style transfer and enhancement to the video frame preparation pipeline that connects images to AI video generation.
How Image-to-Image AI Works
Understanding the technical process behind image-to-image AI helps you get better results. When you know why the AI behaves a certain way, you can provide better inputs, write better prompts, and adjust settings more effectively.
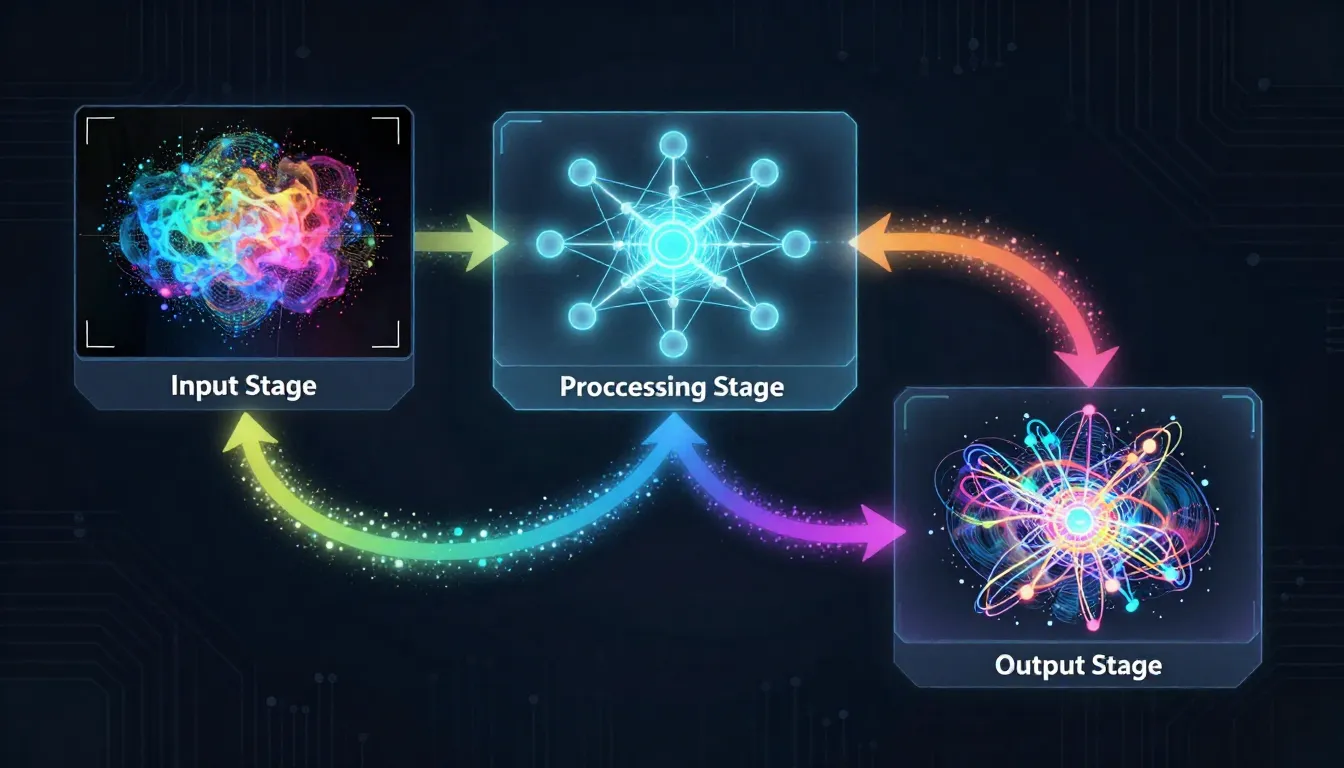
The image-to-image AI pipeline: your source image is partially noised, then denoised under the guidance of your text prompt. The strength parameter controls how much changes.
The img2img Denoising Process
The core mechanism behind image-to-image AI is partial noise diffusion. Here is how it works step by step:
-
Image encoding: Your source image is compressed into a latent representation -- a dense mathematical fingerprint that captures the image's structure, colors, depth, semantics, and composition.
-
Partial noise addition: Instead of starting from pure random noise (as in text-to-image), the model adds a controlled amount of noise to your encoded image. This partially corrupts the image -- blurring some details, shifting some colors, degrading some structures. The amount of noise added is determined by the strength/denoising parameter.
-
Text-guided denoising: The model then reverses the noise process, gradually denoising the corrupted image back into a clean one. But here is the key: this denoising is guided by your text prompt. The model does not simply restore the original image -- it steers the reconstruction toward what your prompt describes.
-
Output decoding: The final latent representation is decoded back into pixel space, producing your transformed image.
The result is an image that sits somewhere between your original and what your text prompt describes. The balance point is controlled by the strength parameter.
The Strength/Denoising Parameter
This is the single most important setting in image-to-image AI. It controls how much the output can deviate from the input:
- Low strength (0.1--0.3): Subtle changes. The output looks very similar to the input with minor adjustments -- slight color shifts, gentle softening, minor style tweaks. The original composition and details are almost entirely preserved.
- Medium strength (0.4--0.6): Moderate transformation. The overall composition and structure are preserved, but significant visual changes are applied. This is where style transfer works best -- the scene is recognizable but the aesthetic is clearly different.
- High strength (0.7--0.9): Major transformation. The AI has enough freedom to substantially alter the image. Only the general layout and broad shapes are preserved from the original. This range is useful for dramatic restyling or when you want the text prompt to dominate.
- Maximum strength (1.0): The original image is essentially ignored. The output is determined almost entirely by the text prompt -- at this point, you are essentially doing text-to-image with a very loose compositional guide.
The rule of thumb: Start at 0.5 and adjust up or down based on your first result. Too similar to the original? Increase strength. Lost too much of the original? Decrease strength.
ControlNet: Structural Guidance
ControlNet is an extension architecture that extracts specific structural information from your input image and uses it as a hard constraint during generation. Unlike standard img2img (which treats the entire image as a soft guide), ControlNet extracts one specific structural element and preserves it rigidly while allowing everything else to change.
Common ControlNet modes:
- Edge/Canny: Preserves the outlines and edges of your image. The AI redraws everything within those edges in a new style. Perfect for style transfer where exact shape preservation is critical.
- Depth: Preserves the spatial depth map (what is close vs. far). Objects maintain their relative positions in 3D space. Perfect for restyling scenes while keeping the spatial layout.
- Pose/OpenPose: Preserves human body poses (joint positions, limb angles). The AI can completely change the person's appearance while maintaining their exact pose. Perfect for character restyling.
- Segmentation: Preserves semantic regions (sky, ground, buildings, people). Each region can be restyled independently while maintaining boundaries.
IP-Adapter: Style and Identity Transfer
IP-Adapter is a different approach that transfers the style or identity from a reference image to your generation. Instead of extracting structural information, it extracts the visual "character" -- the color palette, lighting style, textural quality, or even a person's facial identity.
How it differs from standard img2img: Standard img2img uses your input as both the structural guide and the style source. IP-Adapter separates these roles. You can use one image for structure and a different image for style, combining the composition of one with the aesthetic of another.
Practical example: Use a photograph of a city for structure (buildings, streets, perspective) and a Van Gogh painting as the IP-Adapter style reference. The result: your city scene rendered in Van Gogh's swirling, textured style with accurate composition.
How Text Prompt and Image Combine
The text prompt and source image work together through a weighted blending process. The model simultaneously receives guidance from both inputs:
- Image guidance provides compositional structure, color ranges, depth information, and semantic content
- Text guidance provides stylistic direction, modification instructions, and creative intent
When they align (e.g., your image shows a sunset and your prompt says "golden sunset"), the model reinforces both signals and produces a confident result. When they conflict (e.g., your image shows a beach but your prompt says "snowy mountain"), the model must compromise -- and the strength parameter determines which input wins.
Best practice: Write prompts that complement your image rather than contradict it. Describe the transformation you want, not a completely different scene.
7 Best Image-to-Image AI Tools (2026)
We evaluated seven leading platforms across quality, features, ease of use, and value. All testing conducted in February 2026.
| Tool | Best For | Free Tier | Key Strength | Limitation |
|---|---|---|---|---|
| Seedance Image-to-Image | Video-image pipeline | Yes (free credits) | Seamless image-to-video workflow | Newer platform |
| Stable Diffusion (img2img) | Control and customization | Yes (open source) | Full parameter control, ControlNet, LoRA | Requires technical setup |
| Adobe Firefly | Commercial/professional use | Yes (limited) | Enterprise-grade, Adobe CC integration | Conservative outputs |
| Midjourney (--image) | Aesthetic transformation | No (paid only) | Exceptional aesthetic quality | Limited editing precision |
| DALL-E 3 (ChatGPT edit) | Conversational editing | Yes (ChatGPT free tier) | Natural language interaction | Less granular control |
| Leonardo AI | Creative iteration | Yes (daily tokens) | Real-time canvas, style presets | Token limits on free tier |
| Canva AI | Non-designers | Yes (limited) | Integrated design workflow | Basic transformation only |
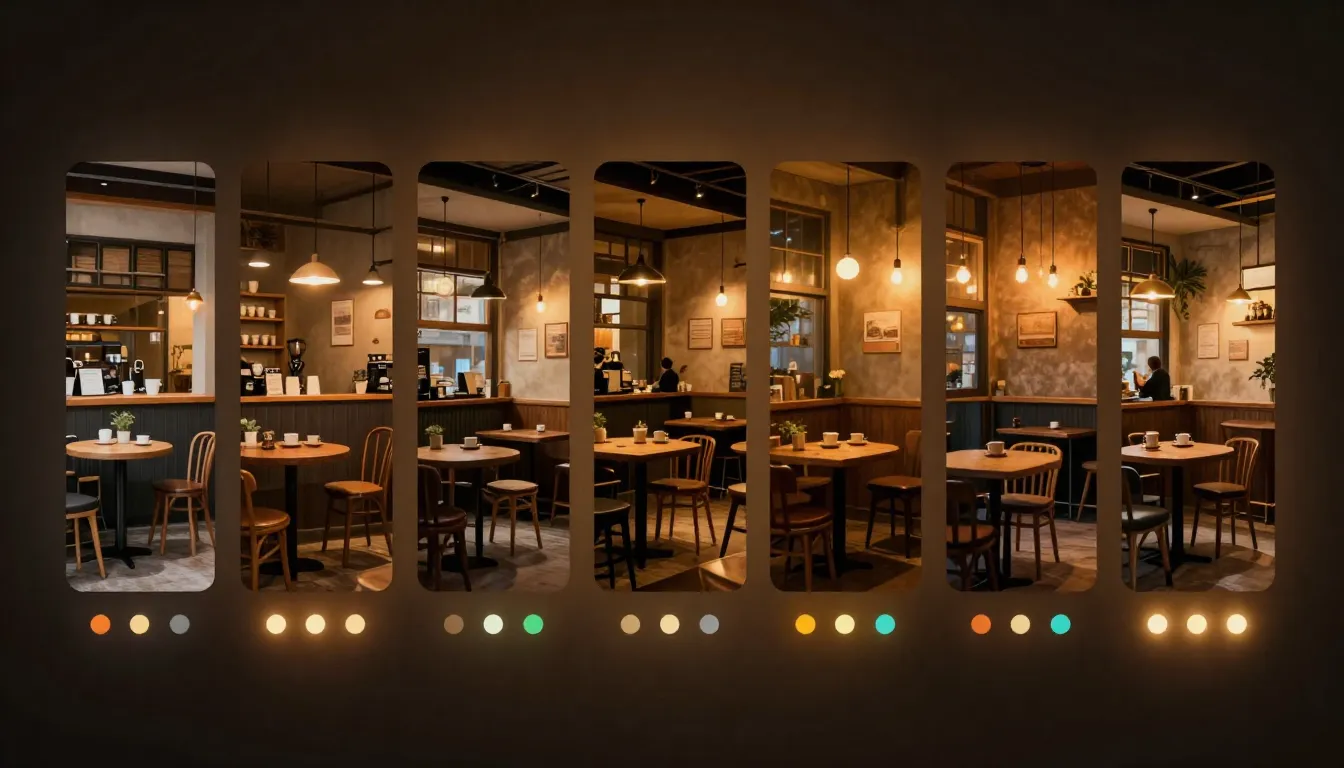
The same source photograph processed through seven different image-to-image platforms. Differences in style fidelity, detail preservation, and transformation quality are immediately visible.
1. Seedance Image-to-Image -- Best for Video-Image Workflow
Seedance stands apart because it treats image-to-image as the first step in a video production pipeline, not a standalone tool. Transform your image, then with one click, send the result directly to image-to-video generation. No downloading, re-uploading, or format conversion. The seamless handoff between image transformation and video creation is unique in the market. Image quality is strong, with support for multiple transformation modes and a text prompt interface that balances power with simplicity. The free tier includes enough credits to test the full workflow from image transformation through video generation.
2. Stable Diffusion (img2img) -- Best for Control and Customization
Stable Diffusion is the open-source powerhouse. It offers the most granular control over every aspect of image-to-image generation: strength, CFG scale, sampling method, step count, ControlNet integration, LoRA model loading, and custom model checkpoints. If you want to fine-tune every parameter and load community-trained models for specific styles, nothing else comes close. The trade-off is complexity -- you need to install ComfyUI or AUTOMATIC1111, manage Python environments, and learn a significant amount of technical vocabulary. Not recommended for beginners, but unbeatable for power users.
3. Adobe Firefly -- Best for Commercial/Professional Use
Adobe Firefly integrates directly into Photoshop, Illustrator, and the broader Adobe Creative Cloud ecosystem. Its Generative Fill and Generative Expand features are polished implementations of inpainting and outpainting. The commercial licensing is the clearest in the industry -- Adobe trained on licensed content and provides explicit IP indemnification for enterprise customers. Outputs tend to be conservative (less creative risk, more predictable quality), which is exactly what commercial production requires. If your workflow already lives in Adobe, Firefly is the natural choice.
4. Midjourney (--image) -- Best for Aesthetic Transformation
Midjourney produces the most visually stunning transformations. Its aesthetic engine consistently generates images with exceptional composition, color harmony, and artistic quality. The --iw (image weight) parameter controls how much the source image influences the output. Results have a signature polished quality that many users prefer for creative and artistic work. The limitation is editing precision -- Midjourney is excellent for broad aesthetic transformation but less capable for surgical edits like inpainting specific regions or making subtle, targeted changes.
5. DALL-E 3 (ChatGPT Edit) -- Best for Conversational Editing
DALL-E 3, integrated into ChatGPT, offers the most natural interaction model. You upload an image and describe your desired change in plain conversational English -- "remove the person on the left," "make this look like a sunset scene," "change the dress to blue." No technical parameters, no slider values, no specialized vocabulary. The AI interprets your intent and executes. This conversational approach is ideal for users who know what they want but do not know the technical terminology. Precision is lower than specialized tools, but accessibility is unmatched.
6. Leonardo AI -- Best for Creative Iteration
Leonardo AI combines image-to-image with a real-time canvas interface that lets you see transformations as you adjust parameters. The suite of pre-built style presets (Fantasy, Anime, Photorealistic, Vintage, and dozens more) makes it easy to explore different aesthetics quickly. The Alchemy refinement pipeline and model-specific fine-tuning produce strong results for creative professionals who need rapid iteration across multiple visual styles. The token-based free tier is generous enough for casual experimentation but runs out quickly during intensive creative sessions.
7. Canva AI -- Best for Non-Designers
Canva AI Magic Edit and Magic Expand integrate image-to-image capabilities directly into the design platform used by millions of non-designers. The interface is the simplest of any tool on this list -- select an area, describe the change, click apply. For users whose primary workflow is creating social media posts, presentations, or marketing materials in Canva, the built-in AI editing eliminates the need to switch to a separate tool. Transformations are basic compared to specialized platforms, but for the target audience, simplicity is the feature.
Our recommendation: If you plan to use transformed images as reference frames for AI video generation, Seedance is the clear choice because of its integrated image-to-video pipeline. For maximum technical control, use Stable Diffusion. For commercial production within Adobe's ecosystem, use Firefly. For pure aesthetic quality, use Midjourney. For a complete comparison of AI image generation tools, see our Best AI Image Generators 2026 guide.
Step-by-Step: Using Seedance Image-to-Image
Follow these five steps to transform any image using Seedance. The workflow is designed to be intuitive, but understanding each step helps you get dramatically better results.
The complete Seedance image-to-image workflow: upload your source, describe the transformation, adjust settings, generate, and optionally transfer the result directly to video generation.
Step 1: Upload Your Source Image
Navigate to Seedance Image-to-Image and upload your source image. Seedance accepts JPG, PNG, and WebP formats.
What makes a good source image:
- Resolution: Minimum 512x512 pixels. Recommended 1024x1024 or higher. Higher resolution gives the AI more information to work with and produces sharper results.
- Clarity: Sharp, well-focused images produce better transformations than blurry ones. The AI cannot add detail that does not exist in the source.
- Composition: Well-composed images with clear subjects translate better into transformed versions. Cluttered scenes confuse the transformation model.
- Lighting: Properly exposed images with good lighting give the AI accurate color and depth information for realistic transformations.
What to avoid:
- Heavily compressed JPGs with visible artifacts
- Screenshots with UI elements or text overlays
- Images smaller than 512x512 pixels
- Overly dark or overexposed photographs
Step 2: Describe Your Desired Transformation
Write a text prompt that describes the transformation you want -- not the image you uploaded. The AI already sees your image. Your prompt should describe what should change.
Effective prompt examples:
For style transfer:
Transform into a vibrant oil painting with thick impasto brushstrokes.
Rich, saturated colors. Impressionist style with visible texture.
Warm golden lighting. Painterly quality.
For enhancement:
Enhance to professional quality. Sharpen details, improve lighting,
add subtle depth of field. Clean, crisp focus on the subject.
Professional studio lighting quality.
For restyling:
Restyle as a cyberpunk neon scene. Add neon pink and teal lighting.
Wet reflective surfaces. Futuristic holographic elements in the
background. Dark atmosphere with vibrant accent lights.
Key principle: Describe the destination, not the journey. Say what the result should look like, not what process to apply.
Step 3: Adjust Settings
Configure the transformation parameters:
| Setting | Recommendation | What It Controls |
|---|---|---|
| Strength/Denoising | Start at 0.5 | How much the output can deviate from the source. Low = subtle, High = dramatic |
| Style preset | Match your goal | Pre-configured aesthetic direction (Photorealistic, Anime, Painting, etc.) |
| Aspect ratio | Match source or target | Output dimensions. Match the source unless you need a specific ratio for video |
Pro tip: For your first generation, use medium strength (0.5). If the result is too similar to the original, increase to 0.6--0.7. If it changed too much, decrease to 0.3--0.4. Two iterations usually find the sweet spot.
Step 4: Generate and Refine
Click Generate and review the result. Evaluate against these criteria:
- Does the transformation match your intended style?
- Are key elements of the original preserved (subject, composition)?
- Is the image quality sufficient for your intended use?
- Are there any artifacts, distortions, or unwanted changes?
Common refinements:
- Too subtle? Increase the strength parameter by 0.1 and regenerate
- Lost the original composition? Decrease strength and be more specific in your prompt about what to preserve
- Wrong style? Adjust your prompt wording. Be more specific about the target aesthetic
- Artifacts on faces or hands? Try a lower strength setting or simplify the prompt
After 2--3 iterations, you will have a polished transformation that matches your creative vision.
Step 5 (Optional): Use as Video First Frame
This is the unique Seedance advantage. Once you have a transformed image you are satisfied with, you can transfer it directly to image-to-video generation with one click. The image becomes the first frame of your AI-generated video.
Why this workflow is powerful:
- Start with any image -- a phone photo, a sketch, an AI-generated draft
- Transform it into a polished, cinematic-grade reference frame using image-to-image
- Send it directly to video generation without downloading or re-uploading
- The video inherits the visual quality and style of your perfected reference frame
This connected pipeline is what makes Seedance the best choice for creators who work across both image and video. No other platform offers this seamless handoff.
Image-to-Image for Video Production
Image-to-image AI is not just an image editing tool. For video creators, it is the preparation stage that determines whether your AI-generated video looks amateur or professional. This section covers the three most valuable video-related workflows.
Preparing Reference Frames
The quality of your video reference frame sets the ceiling for your video quality. Image-to-video models cannot produce output that exceeds the quality of the input frame. If your reference frame is blurry, poorly lit, or stylistically inconsistent, every frame of the generated video will inherit those problems.
Image-to-image solves this by letting you polish any source into a video-ready reference frame:
- From a rough sketch: Transform a pencil concept sketch into a fully rendered, polished illustration that serves as a clean video first frame
- From a phone photo: Enhance a casual snapshot to professional quality with improved lighting, sharpness, and color grading
- From an AI-generated draft: Fix imperfections in a text-to-image output (distorted hands, unnatural lighting, composition issues) before feeding it to video generation
- From a different style: Restyle a realistic photograph into cinematic film-grade quality with appropriate color grading, depth of field, and atmospheric elements
The workflow: Source image --> Image-to-image transformation --> Polished reference frame --> Image-to-video generation --> Professional video clip.
Creating First and Last Frames
One of the most powerful techniques in AI video generation is providing both a first frame and a last frame. The video model generates motion that transitions smoothly between the two. This gives you control over both the starting state and the ending state of your video.
Image-to-image is the fastest way to create matched frame pairs:
- Generate or select your first frame -- the starting state of your scene
- Use image-to-image to create the last frame from the first frame, applying the desired change: a door opening, lighting shifting from day to night, a person turning their head, leaves falling from a tree
- Feed both frames into video generation -- the AI produces smooth motion between the two states
Example: First frame shows a closed flower bud at dawn. Use image-to-image (medium strength, prompt: "The flower is now fully bloomed, warm midday sunlight, petals spread open") to create the last frame showing the open flower. The video model generates the blooming motion between these two states.
This is covered in detail in our AI Video First and Last Frame Guide.
Style Consistency Across Videos
When producing a series of videos (for a brand campaign, educational series, or social media content calendar), visual consistency matters. Each video should feel like it belongs to the same project -- same color palette, same lighting style, same visual treatment.
Image-to-image enables this by applying a consistent style transformation to all reference frames before video generation:
- Define your target visual style (e.g., "warm cinematic color grading, shallow depth of field, amber and teal palette")
- Process each reference frame through image-to-image with the same prompt and strength settings
- All frames now share the same visual treatment
- Generate videos from these consistently styled frames
The result: a cohesive video series with unified aesthetics, even when the source images come from different cameras, different lighting conditions, or different AI text-to-image generations.
For a complete guide on connecting image workflows with video generation, see our AI Image-to-Video Workflow Guide.
The video frame preparation pipeline: rough source image transforms through image-to-image into a polished reference frame, which then becomes a professional AI-generated video.
8 Image-to-Image Prompt Examples
Here are eight practical prompt examples covering the most common transformation types. Each includes the input context, the prompt text, and what to expect from the transformation.
1. Photo to Oil Painting (Style Transfer)
Input: A landscape photograph of a rural countryside with rolling green hills, a farmhouse, and a cloudy sky.
Prompt:
Transform into a rich oil painting in the style of the Dutch Golden Age.
Thick impasto brushstrokes visible in the clouds and grass. Deep,
saturated earth tones -- ochre, burnt sienna, forest green. Dramatic
chiaroscuro lighting with strong shadow contrast. Museum-quality
classical painting aesthetic. Visible canvas texture.
Expected transformation: The photograph's composition is preserved -- same hills, same farmhouse, same sky arrangement. But every surface is now rendered with painterly brushstrokes, the color palette shifts to warm earth tones, and the lighting becomes more dramatic. The image looks like it belongs in an art museum.
2. Sketch to Polished Illustration (Enhancement)
Input: A rough pencil sketch of a fantasy character -- a warrior with a sword and cape, basic proportions and pose defined.
Prompt:
Render as a polished digital illustration with full color and detail.
Professional concept art quality. Detailed armor with metallic
reflections. Flowing cape with realistic fabric physics. Dramatic
rim lighting from behind. Rich fantasy color palette -- deep
blues, golds, and crimson. Sharp, clean linework with painterly
rendering. ArtStation trending quality.
Expected transformation: The rough sketch becomes a fully rendered, professional-quality character illustration. The basic pose and proportions from the sketch are preserved, but every surface is now detailed with materials, lighting, and color. Useful for concept artists who want to quickly visualize rough ideas.
3. Day Scene to Night Scene (Relighting)
Input: A photograph of a city street during daytime with bright sunlight, pedestrians, and storefronts.
Prompt:
Transform to a night scene. Dark blue sky with stars visible.
Street lights and shop windows glow warm amber and yellow.
Neon signs cast colorful reflections on wet pavement. Car
headlights create light trails. Deep shadows between buildings.
Atmospheric haze around light sources. Moody, cinematic night
photography quality.
Expected transformation: The same street composition, but the sky is dark, natural daylight is replaced by artificial light sources, shadows are deep and dramatic, and the overall mood shifts from bright and casual to moody and atmospheric. The structure of the scene is unchanged -- same buildings, same perspective, same street layout.
4. Casual Photo to Professional Headshot (Enhancement)
Input: A casual selfie or snapshot of a person -- decent but not professional quality. Typical phone camera lighting and background.
Prompt:
Enhance to professional headshot quality. Soft, flattering studio
lighting with key light from the upper left. Subtle fill light to
reduce harsh shadows. Clean, softly blurred background. Professional
skin tone rendering -- natural but refined. Slight color grading
for warmth. Sharp focus on eyes. Shallow depth of field. Corporate
portrait photography quality.
Expected transformation: The person's face and pose are preserved, but the lighting becomes studio-grade, the background smooths and blurs, skin tone becomes even and flattering, and the overall quality matches a professional headshot session. The image looks like it was taken by a portrait photographer, not a phone camera.
5. Real Photo to Anime Style (Style Transfer)
Input: A photograph of a young person standing in a park, cherry blossom trees in the background, casual clothing.
Prompt:
Transform into Japanese anime art style. Large expressive eyes,
clean linework, cel-shaded coloring. Soft pastel color palette
with pink cherry blossom accents. Gentle warm lighting with subtle
lens flare. Background rendered in a softer, more impressionistic
anime style. Character proportions adjusted to anime aesthetic.
Studio Ghibli meets modern anime quality. Beautiful and ethereal.
Expected transformation: The scene is recognizable -- same park setting, same person (in anime form), same cherry blossom backdrop. But every element is now rendered in anime style with clean lines, flat color fills with subtle shading, large expressive eyes, and the characteristic warmth of Japanese animation art.
6. Low-Resolution to High-Resolution (Upscaling)
Input: A small, pixelated image (e.g., 256x256 or 512x512) -- perhaps a thumbnail from a website or a heavily cropped photo.
Prompt:
Enhance to ultra-high resolution. Add fine detail to all surfaces
-- skin pores, fabric texture, hair strands, environmental detail.
Sharpen edges while maintaining natural softness where appropriate.
Remove compression artifacts and noise. Professional photographic
quality with clean, crisp detail throughout. 4K quality output.
Expected transformation: The image quadruples (or more) in resolution. Blurry areas become detailed -- you can see individual hair strands, fabric weave, skin texture. Compression artifacts disappear. The image looks like it was taken with a high-end camera rather than extracted from a low-resolution source.
7. Photo to Video-Ready First Frame (Video Preparation)
Input: A standard photograph of a person standing in an urban environment -- good composition but standard phone camera quality.
Prompt:
Enhance to cinematic first-frame quality. Apply film-grade color
grading with warm highlights and cool shadows. Add subtle
atmospheric haze in the background. Shallow depth of field with
creamy bokeh. Professional lighting enhancement -- add a warm rim
light on the subject. Slight film grain for texture. Anamorphic
widescreen aesthetic. Ready for cinematic video production.
Expected transformation: The photograph is elevated to cinematic quality -- color-graded like a film frame, with enhanced depth of field, atmospheric elements, and professional lighting. The image now serves as a perfect first frame for image-to-video generation, setting the visual standard for every subsequent generated frame.
8. First Frame to Last Frame Variation (Video Storytelling)
Input: An image of a woman standing at a window in a room during golden hour -- warm sunlight streaming through the curtains.
Prompt:
Same scene, but now during blue hour. The warm golden sunlight
has faded to deep blue twilight. The room is lit by warm interior
lamps instead of sunlight. The woman has turned slightly to look
away from the window. Curtains are now still (no wind). Cool blue
tones dominate outside, warm amber tones inside. Contemplative,
quieter atmosphere. Same composition and perspective.
Expected transformation: The composition and room are identical, but the lighting has shifted from golden hour to blue hour. The warm sunlight through the window is replaced by cool blue twilight outside and warm lamplight inside. This becomes the last frame for a video that shows the passage of time -- the video model generates the smooth transition from golden hour to blue hour.
Common Mistakes and How to Avoid Them
After extensive testing across multiple image-to-image platforms, these are the five most common mistakes users make -- and the straightforward fixes for each.
1. Transformation Strength Too High
The mistake: Setting the denoising strength to 0.8 or higher on the first attempt, expecting a dramatic transformation.
Why it fails: At high strength, the AI has so much freedom to deviate from the source that it essentially creates a new image loosely inspired by the original. You lose the composition, subject details, facial features, and structural elements that made you choose that source image in the first place.
The fix: Start at 0.5 and increase by 0.05--0.1 per iteration. Find the point where the transformation is strong enough to be interesting but not so strong that you lose the original's identity. For style transfer, 0.4--0.6 is usually optimal. For subtle enhancement, 0.2--0.35 works best.
2. Contradictory Prompt and Source Image
The mistake: Uploading a photograph of a beach and prompting "snowy mountain landscape with pine forests." Or uploading a portrait and prompting "vast empty desert with no people."
Why it fails: The text prompt and source image pull the model in opposite directions. The model tries to compromise between contradictory signals, producing confused, artifact-heavy output that satisfies neither instruction. Faces might appear in landscapes, buildings might warp into impossible shapes, and the overall result looks neither like the source nor like the prompt.
The fix: Write prompts that modify or restyle the existing image rather than replacing it entirely. "Beach scene" + "transform to sunset lighting with dramatic clouds" works. "Beach scene" + "make this a snowy mountain" does not. If you need an entirely different scene, use text-to-image instead.
3. Expecting Pixel-Perfect Surgical Editing
The mistake: Expecting image-to-image to make precise, pixel-level edits like removing a specific button from a shirt or changing the exact shade of one small object.
Why it fails: Image-to-image AI is generative, not surgical. It regenerates regions of the image guided by your prompt. Fine-grained edits may affect surrounding areas, introduce subtle changes to nearby elements, or not precisely hit the exact target. It is a creative tool, not a pixel editor.
The fix: For precise edits to specific regions, use dedicated inpainting tools with explicit mask selection rather than full-image transformation. For broad style changes, full img2img is appropriate. Match the tool to the precision level you need. If pixel-perfect editing is required, combine AI with traditional editing tools like Photoshop.
4. Using Very Low-Resolution Source Images
The mistake: Uploading a 200x200 thumbnail, a heavily cropped image, or a screenshot from a video and expecting high-quality output.
Why it fails: The encoder extracts information from the source image. If there is minimal information (few pixels, heavy compression artifacts, no fine detail), the model has little to work with. AI upscaling before img2img can help, but it adds interpolated pixels, not real visual information. The result inherits the source's limitations.
The fix: Always use the highest-resolution version of your source image available. Minimum 512x512 pixels. Recommended 1024x1024 or higher. If you only have a small image, use a dedicated AI upscaler (Real-ESRGAN, Topaz Gigapixel) as a preprocessing step before img2img transformation.
5. Ignoring the Importance of the Text Prompt
The mistake: Uploading a great source image but writing a vague or minimal prompt like "make it better" or "improve this image."
Why it fails: The text prompt provides directional guidance for the transformation. Vague prompts give the model no clear direction, so it makes arbitrary changes -- shifting colors slightly, adding random textures, or producing output nearly identical to the input. The model does not know what "better" means without specific guidance.
The fix: Be specific about what you want changed. Instead of "make it better," write "enhance sharpness, improve contrast, add warm color grading with golden highlights and cool shadow tones, increase depth of field blur in the background." Specific prompts produce specific, predictable results. For prompt writing guidance, see our AI Image Prompt Generator Guide.
Frequently Asked Questions
What is image-to-image AI?
Image-to-image AI is technology that takes an existing image as input and generates a modified version based on your instructions. You upload a photograph, sketch, or illustration, provide a text prompt describing the desired change (style transfer, enhancement, editing, restyling), and the AI produces a transformed image. Unlike text-to-image AI which creates images from scratch, image-to-image starts with your visual reference and modifies it -- preserving the parts you want to keep while changing the parts you want to alter.
What is the difference between image-to-image and text-to-image?
Text-to-image creates a brand new image from a written description. The AI decides the composition, colors, subject appearance, and every visual detail based on your text. Image-to-image starts with an existing image and modifies it. The source image provides the composition and visual foundation; your text prompt provides the transformation direction. Text-to-image is best when you want the AI to create something from nothing. Image-to-image is best when you already have a visual starting point and want to refine, restyle, or enhance it. For a complete guide on text-to-image, see our Text-to-Image AI Complete Guide.
Can I edit specific parts of an image?
Yes, through inpainting. Inpainting lets you select (mask) a specific region of an image and modify only that area while leaving the rest untouched. You can remove unwanted objects, change backgrounds, alter clothing colors, fix facial features, or add new elements -- all within a targeted region. Most image-to-image platforms offer inpainting as a separate mode. The quality of the edit depends on the tool and the complexity of the change. Simple object removal works reliably. Complex structural changes (like changing a standing pose to sitting) are less predictable.
Which is the best image-to-image AI tool?
It depends on your workflow. Seedance is best if you plan to use transformed images as reference frames for AI video generation -- its image-to-video pipeline is unmatched. Stable Diffusion is best for technical users who want maximum control over every parameter. Adobe Firefly is best for commercial production within the Adobe ecosystem. Midjourney produces the most aesthetically stunning transformations. DALL-E 3 is best for casual users who want to describe edits in plain English. See our Best AI Image Generators 2026 for a comprehensive comparison.
Is image-to-image AI free?
Several platforms offer free access with limitations. Seedance provides free credits to new users -- enough to test the image-to-image and video workflow. Leonardo AI offers daily free tokens. DALL-E 3 is accessible through ChatGPT's free tier. Stable Diffusion is entirely free and open source if you run it locally on your own hardware (requires a GPU). For regular production use, paid plans on any platform offer more generations, higher quality, and additional features. Free tiers are best for testing and light use.
Can I use image-to-image to prepare video reference frames?
Absolutely. This is one of the most valuable applications of image-to-image AI. You can take any image -- a rough sketch, a phone photo, an AI-generated draft -- and transform it into a polished, cinematic-grade reference frame suitable for video generation. Adjust the lighting, color grading, and style to match your target video aesthetic. Then feed the transformed image directly into image-to-video generation. Seedance makes this particularly seamless with its integrated image-to-video transfer.
How much does the source image influence the output?
This is controlled by the strength/denoising parameter. At low strength (0.1--0.3), the source image dominates -- the output looks very similar to the input with subtle modifications. At medium strength (0.4--0.6), you get a balanced blend where the composition is preserved but the visual style changes noticeably. At high strength (0.7--0.9), the text prompt dominates and the source image serves as only a loose guide. At maximum strength (1.0), the source image is effectively ignored. Start at 0.5 and adjust from there.
Can image-to-image AI upscale low-resolution images?
Yes. AI upscaling is one of the core image-to-image capabilities. Unlike traditional upscaling that simply interpolates between existing pixels (producing blurry results), AI upscaling generates new visual detail. The model infers what fine detail should exist based on the image context -- adding realistic texture, sharpness, and micro-detail that did not exist in the original low-resolution source. Results are most impressive when upscaling from medium resolution (512x512) to high resolution (2048x2048). Upscaling from very low resolution (under 256x256) produces less reliable results because there is too little information for the AI to work with.
Start Transforming Your Images
Image-to-image AI is the most practical creative AI tool available in 2026. It does not require you to master prompt engineering from scratch -- you start with an existing image and describe what you want changed. The learning curve is gentler than text-to-image, and the results are more predictable because the AI has a concrete visual reference to work from.
Whether you need to restyle photographs for brand consistency, enhance low-resolution images for professional use, prepare reference frames for video generation, or simply explore creative possibilities with your existing visual library, image-to-image AI delivers.
Here is the clear path forward:
- Start with image-to-image to transform and perfect your images
- Use text-to-image when you need to create something entirely new
- Connect both to image-to-video for the full creative pipeline
Try Seedance Image-to-Image --> -- upload any image and see it transformed in seconds. Free credits, no credit card required.
Create images from text --> -- when you need to generate a brand new image from a description.
Turn images into videos --> -- take your transformed image and generate a cinematic video clip.
Generate perfect prompts --> -- use AI to write optimized prompts for any image generation task.
Related reading: Text-to-Image AI Complete Guide | Best AI Image Generators 2026 | AI Image Prompt Generator Guide | Image-to-Video AI Guide | AI Video First and Last Frame Guide | AI Image-to-Video Workflow Guide