
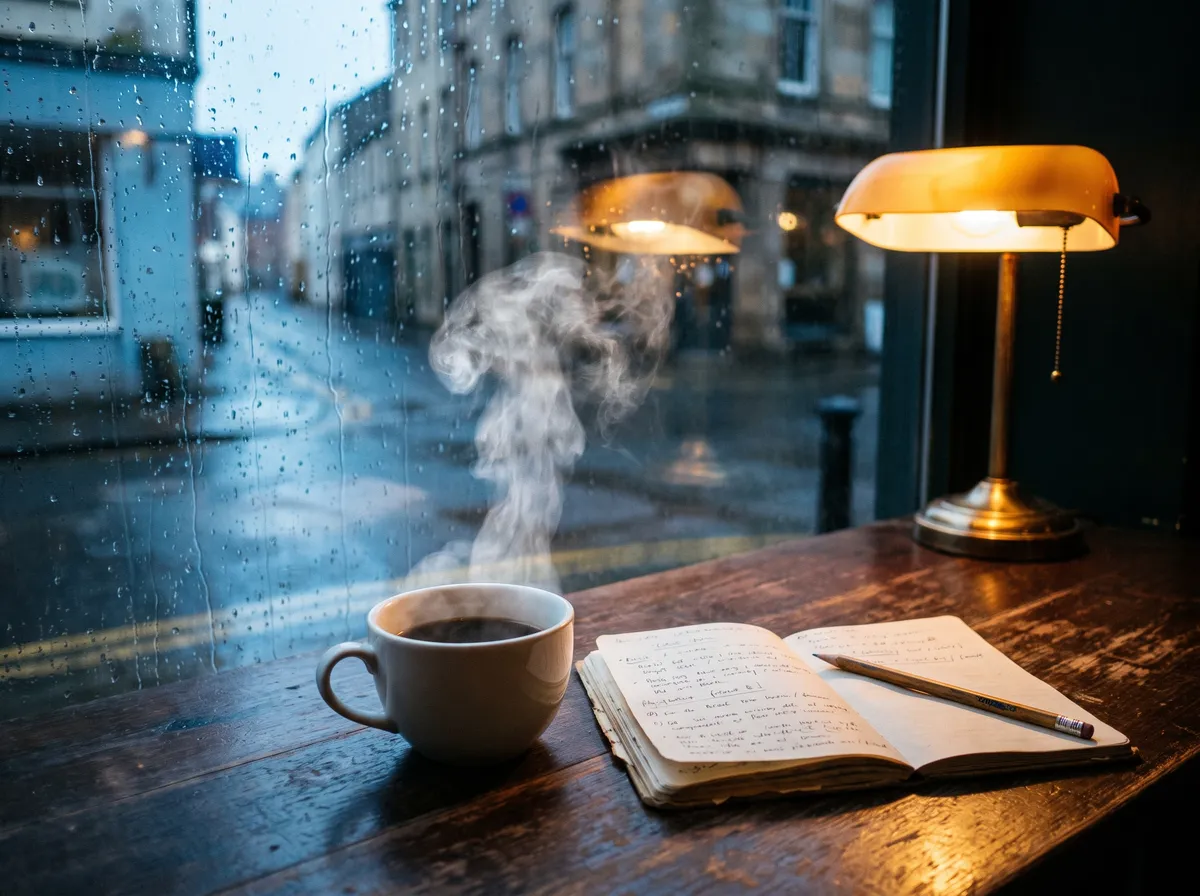
A cinemagraph is a still photo in which one small element moves in a seamless, endless loop, while everything else in the frame stays perfectly frozen. Steam rises from a cup, but the cup, the table and the street outside never move. This guide explains what a cinemagraph is, how it differs from a GIF or a Live Photo, and how to make a cinemagraph yourself, either the traditional way or with AI, using two examples we built from scratch for this article.
What is a cinemagraph?
The word combines "cinema" and "photograph". The format was named in 2011 by photographer Jamie Beck and designer Kevin Burg, who used it for fashion and street images in which a single detail kept moving. Every cinemagraph shares four traits:
- Mostly still. At least most of the frame is a frozen photograph.
- One focused motion. A single area moves: steam, water, a flag, a flickering light.
- A seamless loop. The motion repeats with no visible jump at the end.
- No sound. It is meant to be looked at, not listened to.
That mix is why cinemagraphs stop people scrolling. The eye expects a photo, notices that something is alive, and looks again.
Cinemagraph examples
Here is our second cinemagraph: a cabin under the northern lights, where only the aurora moves.
Other classic cinemagraph subjects: a candle flame in a dark room, rain on a window, a waterfall in a still forest, a neon sign flickering on a quiet street, a scarf moving in the wind on an otherwise motionless portrait.
Cinemagraph vs GIF vs Live Photo vs video
People often use these words interchangeably, but they describe different things. A cinemagraph is a style; GIF and MP4 are file formats you can save it in.
| Cinemagraph | GIF | Live Photo | Video | |
|---|---|---|---|---|
| What it is | A style: a still image with one looping motion | A file format for short animations | An iPhone feature that saves about 1.5 seconds before and after the shot | Full motion footage |
| What moves | One area only | Anything | The whole frame | The whole frame |
| Loops seamlessly | Yes, by design | Only if made that way | No | No |
| Sound | No | No | Yes | Usually |
To see why the format matters, we exported the same 480 x 360 coffee cinemagraph twice. As a GIF it is 755 KB; as an MP4 it is 85 KB, roughly nine times smaller, and the MP4 also keeps full color. You can open the GIF version to compare. Use MP4 for websites and social platforms, and keep GIF for places that cannot play video, such as most email clients.
How to make a cinemagraph the traditional way
Before AI, every cinemagraph started as a video. The classic workflow looks like this:
- Shoot a short clip on a tripod. The camera must not move at all, and only one thing in the scene should move.
- Pick a still frame from the clip to use as the frozen background.
- Stack the still frame above the video in an editor such as Photoshop, After Effects or DaVinci Resolve.
- Mask a hole in the still frame over the area that should move, so the video shows through only there.
- Trim the clip so it loops, then export it as MP4 or GIF.
Adobe's own workshop video, Creating cinemagraphs with Photoshop, shows this approach with a stock video clip and masking in Photoshop (accessed October 8, 2026). The hard part has always been step 1: you need the right footage, shot with a locked camera.
How to make a cinemagraph with AI
AI image to video removes the need for footage. You start from a single photo and let the model create the moving part. Here is the exact process we used.
Step 1: Start with the right still image
Choose a photo with one obvious moving element and a clear separation between that element and the rest of the scene. Steam against a dark background, a sky above a horizon or water below a bridge are ideal. If you do not have a suitable photo, generate one with Text to Image; both of our source images were created that way.
Step 2: Generate a short clip where only one thing moves
Upload the photo to GenWorldAI Image to Video, choose 4 seconds and turn audio off. In the prompt, describe the one motion you want and say clearly that everything else stays still. This is the prompt we used:
Only the steam rises and curls slowly above the coffee cup. Everything else stays completely still: the cup, the notebook, the lamp, the window and the raindrops do not move. Static camera, locked-off tripod shot, no camera movement, no zoom.
Step 3: Check for camera drift
The coffee clip came out with a steady camera on the first try. The aurora did not. Twice, with prompts that said "static camera" and "the camera does not move", the model still pushed slowly toward the cabin. Compare the first and last frames of one of those attempts:
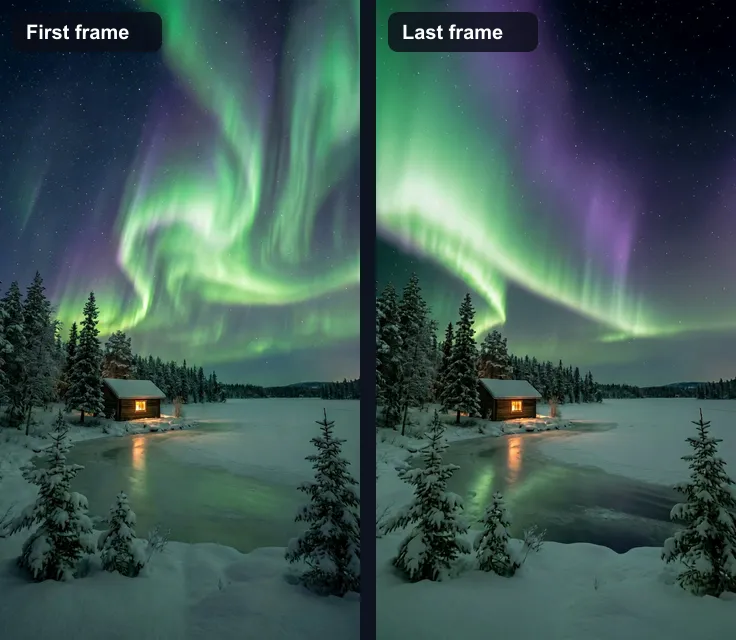
A moving camera ruins a cinemagraph, because the frozen and moving parts no longer line up. The fix that worked for us: upload the same photo twice, as both the start frame and the end frame. The model then has to finish exactly where it began, which keeps the framing steady and gives you a clip that loops on its own. Our third aurora attempt used this trick and produced the cinemagraph shown above.
Step 4: Mask everything except the moving area
Even a good clip has small changes outside the area you care about. To get a true cinemagraph, freeze everything else: place one still frame on top of the clip and cut a soft edged hole only where the motion should show.
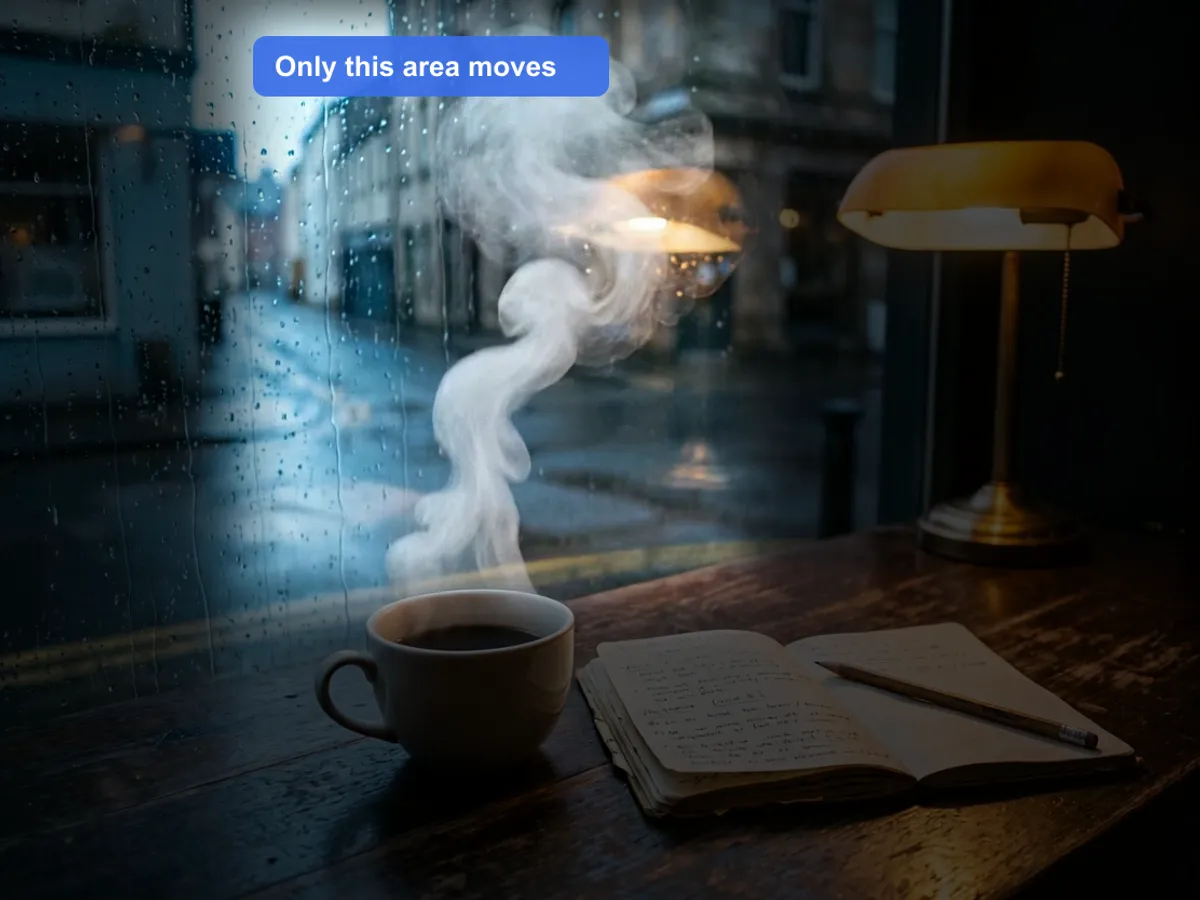
You can do this in any editor with layer masks. If you prefer Photoshop, it helps to convert the still image to a layered PSD first with ImageToPsd.AI, so the subject and the background already sit on separate layers and the area that should move is quick to select. For the examples in this article we did the masking with the free command line tool ffmpeg, using a feathered mask image and an overlay.
Keep the mask a little larger than the moving element. Too tight and the motion gets cut off at a hard edge; too loose and small shimmers in the frozen area give the trick away.
Step 5: Make the loop seamless
A clip that simply restarts will jump at the end. Three ways to hide the join:
- Cross-fade the end into the start. For the coffee we played seconds 1 to 3 of the clip, then faded the last second into the first second, which gives a smooth 3 second loop. This works best for steam, smoke and water that flow in one direction.
- Use the same start and end frame, as with the aurora. The clip already ends where it began.
- Play forward, then backward (a "boomerang"). Fine for symmetric motion such as a swaying flag or a flickering sign, but steam or water running backwards looks wrong.
Step 6: Export for where it will be shown
Export as MP4 (H.264, no audio track) for websites, Instagram, TikTok and ads. Keep it short; 3 to 6 seconds is typical. Export a GIF only for email or other places that cannot play video, and keep it small, since GIF files grow quickly.
Cinemagraph prompt ideas
Copy one of these into an image to video tool along with a matching photo, and replace the bracketed part. Each one names a single motion and tells the model what must not move.
Only the candle flame flickers softly. The room, the table and every object stay completely still. Static camera, no camera movement.
Only the water of the waterfall flows. The rocks, trees and sky stay completely still. Static camera, no zoom.
Only the [neon sign] flickers and buzzes with light. The street, the walls and the puddles stay completely still. Locked-off tripod shot.
Only the [scarf] moves gently in the wind. The person stays perfectly still, as if frozen in time. Static camera, no camera movement.
Only the clouds drift slowly across the sky. The buildings and the street below stay completely still. Static camera, no zoom.
Results vary by scene. Our steam prompt worked first time, while the aurora needed the same start and end frame trick, so check every clip for drift before you start masking.
Common cinemagraph mistakes
- Choosing a scene that invites camera motion. Wide landscapes tend to get slow drone style moves from AI models, as our aurora did.
- Letting too much move. If people walk through the frame and the trees sway, it is a video, not a cinemagraph.
- A visible jump at the loop point. Use a cross-fade or the same start and end frame.
- A hard mask edge. Feather the mask so the moving area blends into the frozen one.
- Publishing a heavy GIF on a web page. Use MP4 instead; ours was about nine times smaller.
FAQ
What is a cinemagraph?
A cinemagraph is a still photograph in which one small part moves in a continuous loop while the rest of the image stays frozen, for example steam rising from a cup in an otherwise motionless scene.
Can you give me an example of a cinemagraph?
The coffee cup at the top of this page is a cinemagraph: only the steam moves. Other common examples are a flickering candle, rain on a window, a flowing waterfall in a still forest and the aurora cinemagraph shown above.
What is the difference between a GIF and a cinemagraph?
A GIF is a file format that can hold any short animation. A cinemagraph is a visual style: a mostly still image with one looping motion. A cinemagraph can be saved as a GIF, but for the web an MP4 is usually far smaller.
How do I create a cinemagraph?
Start with a short clip where only one thing moves, either shot on a tripod or generated from a photo with AI image to video. Freeze everything else with a still frame and a mask, make the end meet the start, and export it as an MP4.
Can I make a cinemagraph from a single photo?
Yes. Upload the photo to an image to video tool, describe the one element that should move, and use the same photo as both the start and the end frame if the camera tends to drift. Then mask and loop the result as described above.
Make your first cinemagraph
Pick a photo with one thing that could move, generate a 4 second clip in GenWorldAI Image to Video, and check it for camera drift before you mask and loop it. For more ways to bring stills to life, see our guide on how to animate a photo.
How we made the examples: both source photos were generated with the Nano Banana Pro model and animated with the GenWorldAI 1.5 Pro model at 720p with audio off on October 8, 2026. The aurora took three generations: two prompt-only attempts drifted, the third used the same image as start and end frame. Masking, looping and the GIF versus MP4 comparison were done with ffmpeg; no frames were repainted.